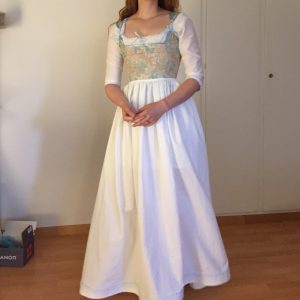
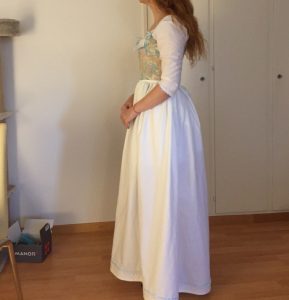
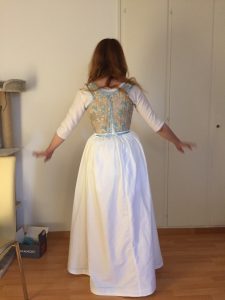
I am finally back to sewing and I even have progress to show, hurray. The last few weeks I invested my time in finishing a set of 18th century undergarments consisting of a shift, a pair of stays, a bumpad and a petticoat. I really like how the set turned out, the pieces look nice together. Shift, bumpad and petticoat are made from a white lightweight cotton and decorated with a white lace trim. To match the trim to my stays, that are made from a beautiful rose and mint jacquard and light blue satin bias binding, I also used a light blue ribbon.
Now, on to the different pieces starting with:
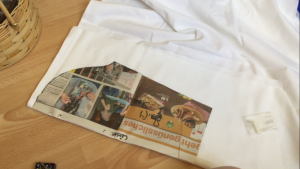
Before my machine left me, I already started making the shift as well as drafting the pattern for my stays. For my first steps, just follow this link.
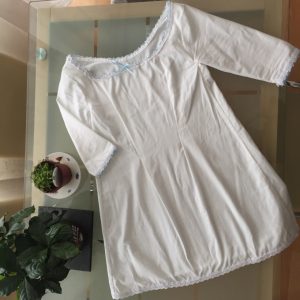
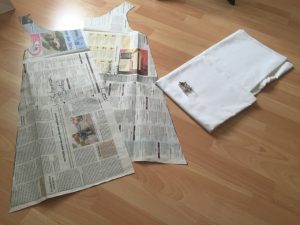
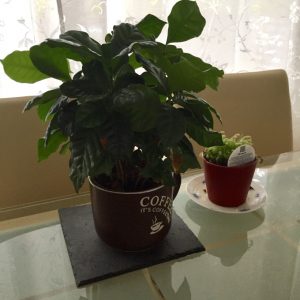
A different approach for this post, I thought, I could for once start with pictures of the finished garments (also starring my coffee plant…). Ironing might have been a good idea. Well, lets start with the pattern for the shift. It has a square neckline, 3/4 sleeves and an a-shaped ,skirt’.
The pattern for the shift was, like almost every other pattern I make, drafted from my dressform. Unfortunately I did not realise how short this would be on me until I tried it on. So it is quite a mini shift instead of a kneelong garment… Since I did not want to waste the material and time, I went on with it.
It is a two piece pattern and I cut both pieces on the fold. After that, they were sewn together with french seams. The fabric I chose was great for the petticoat and the ruffles, but a bit too stiff for the shift. I ended up adding darts to it, because I absolutely did not like how the fabric draped. It was also a bit too loose on me, the darts solved the problem.
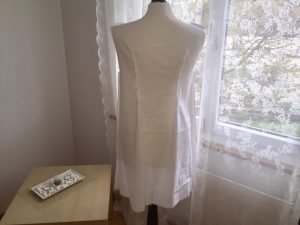
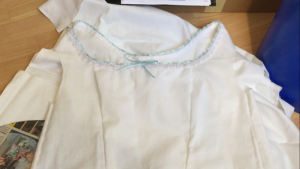
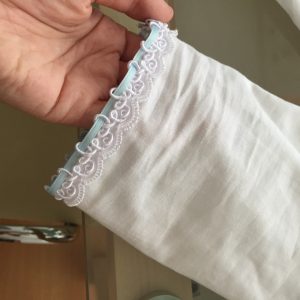
The raw edges were bound with white bias binding. Over it I used a lace trim and added a blue ribbon to decorate it even more.
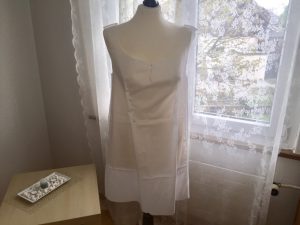
After that, I only had to make the sleeves to finish the shift. For sleeves I usually copy an older pattern that I know works, then make a mockup and adjust that pattern to what I need for the garment I’m making.
The sleeves were also sewn together with french seams, than attached to the shift. I bound the raw edges and added the lace trim and the blue ribbon. And that is it for my shift.
Now on to the next garment we would put on: the stays.
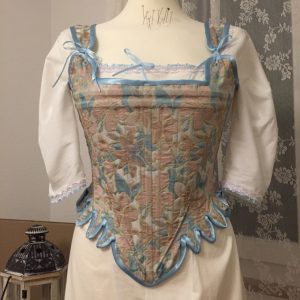
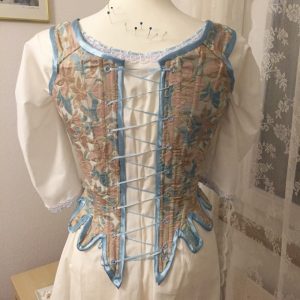
They were a bit more complicated… I struggled quite a bit with the construction and they were really time consuming but they are done now and I love how they look. They also give me a nice shilouette and fit perfectly.
The pattern was drafted flat, not on my dressform. I used her once I had the pieces cut out and sewn together a first time.
My inspiration came from one of the patterns in Mandy Barringtond book ,Stays and Corsets’. I did not really follow her instructions, maybe I should have. But her illustrations were great for drafting my own pattern.
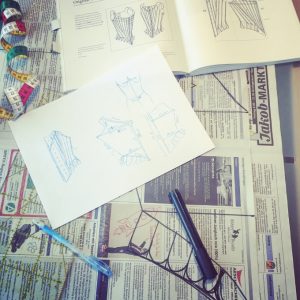
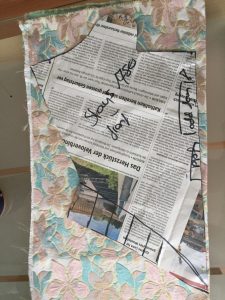
I made a few alterations after my first try. Less tabs, a wider and more squareshaped neckline, shorter straps in the front etc. On the picture you can see my first pattern (it was not good at all)…

After all the adjustments, I cut the pattern (it has two pieces, the front piece was cut on the fold). I absolutely adore the fabric I used for the top layer. Since I had the feeling, that the neckline might still not be wide enough, I added another 2 centimeters while cutting out the pieces.
I sewed the pieces together and ironed all seams.
Next where the boning channels. I directly marked them on the base layer, so the inside of my stays looks rather messy.
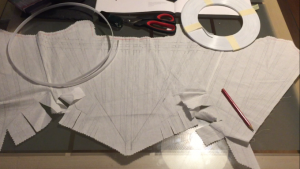
I used a red coloured pencil to draw out the lines I had to stitch and then started sewing all the boning channels. It took quite some time and I had to pay attention since I had to leave some seams for later. By sewing them, I would have closed the channels above.
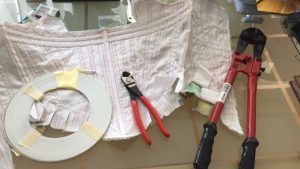
Then I started to add boning. I used three different kinds of boning. A bendable but stirdy plastic version (for the horizontal bones and the side ones that have to bend at the waist), light plastic boning for the tabs and hoopskirt wire for the rest. It is not uncomfortable at all, it’s much better to wear than my other corsets, I love it.
After I inserted all the boning possible, I finished the remaining channels and inserted boning there too.

Then I had to bind all raw edges which was even more time consuming than sewing all these boning channels. But I did it, watching a ton of movies next to it. I finally watched ,Logan’, I missed it in cinema.
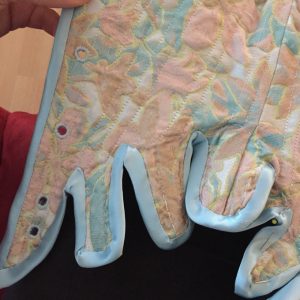
I also handsewed all the eyelits. Before binding the top of my stays I added the straps. These have no base layer, which I regret looking back. They are flimsy. After binding the top edges I worked a bit on the inside of my stays. Just for security I added a thick and stirdy ribbon where the bones meet my hips. I taped them but I don’t trust myself… I used the same ribbon to finish the raw edges where I sewed the straps to my stays.

And that was all. I had to cut the lightblue ribbon to the right length for the lacing and to hold the straps in place and then the stays where finished.
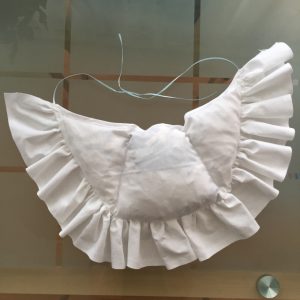
About this, I really don’t have much to say. It is not as poofy as others, but that is intentional, the gown I want to make does not look that poofy on the reference pictures. I may make a second bumpad for other dresses from the period.
I really only cut out two ,crescent moons’, sewed them together on one side, parted it into three compartments, filled those with scraps, added ribbon and then used bias binding to finish the raw edges. And that is it. Oh wait, thats a lie. I also added ruffles to it on the outer side. Just a gathered stripe of fabric that was cut on the selvage. I sewed it in when I sewed the top and bottom layer together.
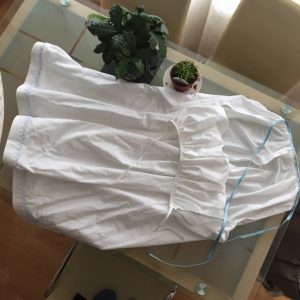
The last thing I wanted to make was a pettycoat. The skirt beneath the redingote will not have ruffles or anything to give it some shape.
And here it is.
The coffee plant is called Hadufuns by the way. And the carnivore next to him has the very creative name Sarcenia. They are happy to meet you! Aren’t they pretty? I have no bond to plants but I am fighting for the live of these two since two years now. They made it so far…
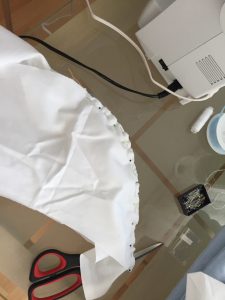
For the petticoat I used an about 2 1/2 meters long piece of fabric, that I draped on my dressform and then cut to approximately the right length. After that I finished the backseam and cut a slit on each side (the backseam stays in the back). The fabric was gathered and I did the seams for the slits. With the rest of the white and light blue bias binding I bound the gathered edges and created the straps to close the garment. Then I did the hem and added horse hair braid to stiffen it. The only thing left to do was decorating it to match the other garments and to hide the stitchline. Well, one of them at least.
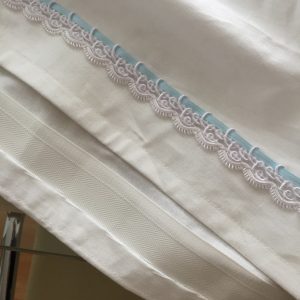
The lace trim was about 20 cm too short… Wich is not cool, Now I have a gap in the back. I can live with it, it is beneath the rest but 20 cm suck… why not half a meter? At least I could blame myself correctly for that.
I like it nontheless and it is comfortable to wear.
And that is it! Here you can see pictures of me wearing my set of 18th century undergarments. I had to ask my boyfriend for help since I could not lace my stays up properly myself. He had fun I guess :P.
There’s also a video about it on Youtube:

By loading the video, you agree to YouTube's privacy policy.
Learn more
I hope you enjoyed and I wish you a nice time :). Thank you for reading.