Welcome to a new post on my blog. I own a new sewing machine and it is so good. I should have invested in a better one since quite some time… Loking back I’m somehow glad, my old machine did not survive. Anyways, that is not the topic! The first ,bigger thing’ I made on my new machine is a maxidress with a pleated bodice. The bodice is copied from one of my favourite dresses in my wardrobe that is sadly starting to fall apart. After years… So, shall we be making a maxidress together?
The fabrics I used for this dress are all from Buttinette. I used:
This is it… I will bury it playing Mozart’s ,Requiem’ should it really fall apart. I adore this dress. There is a second one, also by Orsay, that I will copy too in the future. It has a really gorgously cut pencil skirt. At the moment, fashion seems so boring to me ^^’. I like clever cuts and colours.
I started by drafting the pattern with the help of the original dress.
That is what I ended up with. This is the pattern for the lining. The lining was made from a lightweight cotton fabric. The backpanels and straps where the same for the chiffon layer but I cut the waistband on the fold to allow me pleating it and I draped the frontpart in two pieces. I made slight changes for the waistband since I did not want it as loose as it is on the original dress.
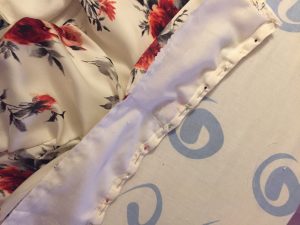
I cut out all pieces of the lining, sewed them together and tried the bodice on. I only hat to change one seam a bit. After that I first finishet the waistband. I made the pleats and then sewed toplayer and lining onto each other. Looking back, that was a bad idea. I will change this next time because it left me with raw edges where I joined waistband and bodice and waistband and skirt.

Then I started draping the pleated parts and cut out the backpieces and the straps from chiffon.

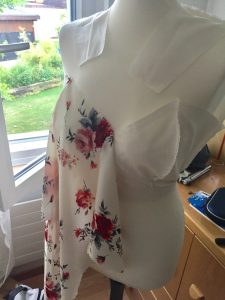
After that, I sewed the jauvanaise parts together and sewed the lining in (after ironing the seams open). Then the bodice was complete, apart from the fact, that I had to bind the raw edges which was not all that funny…
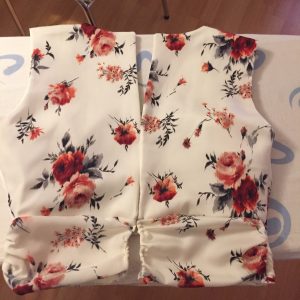
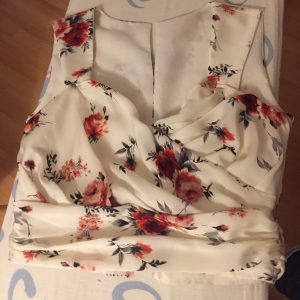
Here you can see the front and back of the bodice.
The skirt was the easiest part. I decided to do a gathered skirt with a 3 meter wide hem. I had to line it, as the chiffon is seethrough. For the lining I went with a width of 2 meters and a lengh of 0.8 meters. I love full skirts!

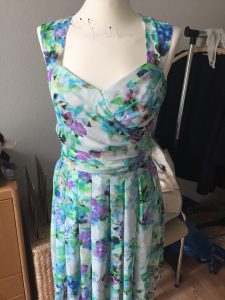
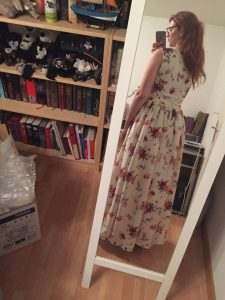
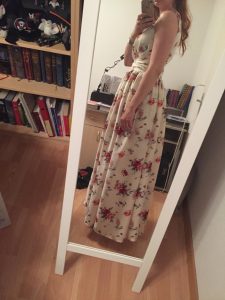
I gathered the two layers and handsewed them together. Then I attached the skirt to the waistband by machine. I trimmed the seam a bit and then again covered the raw edges with bias binding. I hemmed the dress and did the back seam (using a french seam because I did use enough bias binding for my taste…). After that, the dress was finished apart from my alltime favourite task: add the zipper. It looks better than expected but is far from perfect. I really am not able to sew a zipper in nicely… But the dress fits perfectly and I adore the full and floor long skirt. I can ignore the sloppy upper part of the back :P.
Here are some pictures. Excuse the light, it’s pouring outside. But I wont complain, I really am no summer girl. I prefer cooler temperatures. It is so refreshing. I hope the next week will be nice and rainy.


Thanks a lot for reading, I hope you enjoyed the post 🙂 A little comparison: