Welcome back to my blog and welcome to part two of sewing an 1890s corset with me. Today I show you how I cut out and assembled the corset from coutil, from beginning to the end. This corset is done with Nehelenia Patterns Corset Kit for Past Patterns 213, 1890s corset pattern.
You can find part 1 of making this corset here.
When sewing a corset, you want your pieces to be perfectly on the grain line of your fabric, as marked on your pattern. You don’t want your corset to be stretchy in places it’s not intended to be. To be as precise as possible and to have my corset pieces as close to perfect on the grain line as possible, I decided to lay the pieces onto the coutil and trace them with chalk. I transferred all the information from the pattern onto the pieces and then cut them out.


I started to assemble the pattern pieces for both sides of the corset, making sure, that I align the waistline marked on the pieces when pinning them together.
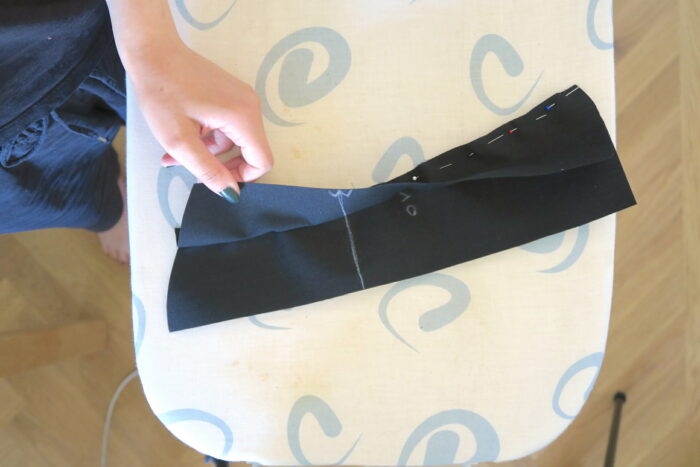
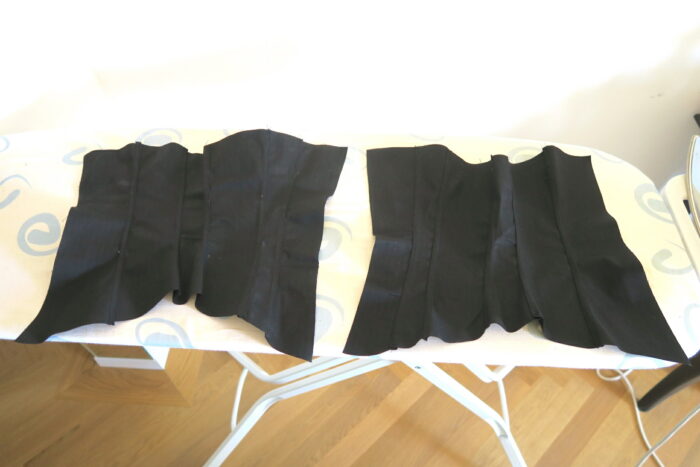
Then I sewed them together with one centimetre of seam allowance. I used felled seams to assemble the corset. After sewing the pieces together, one side of the seam allowance is cut down. The other side of the seam allowance is ironed around the shorter part, so it hugs it and all raw edges are hidden. Then I pinned this down and sewed close to the edge.

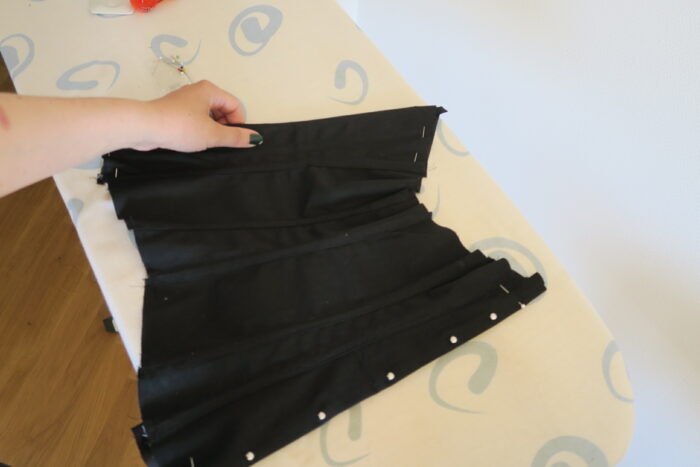
I did this for all the seams and it looked like this, when I finished:
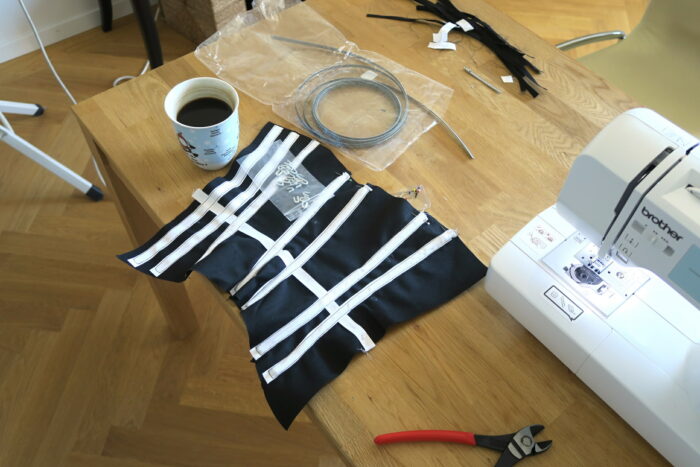
Then it was time to add the waistband and the boning channels. First, I pinned the waistband over the line marked on the pattern pieces. Then, I pinned the boning channels over the waistband. The waistband will be sewn in place together with the boning channels. I used twill tape to create the boning channels, it’s sturdy and durable.

I sewed all boning channels down, leaving the top edge open. Then I cut my spring steel to the right size and added the ending caps to it to make sure, the sharp edges won’t destroy the twill tape. The boning was inserted and I closed the boning channels by machine at the top.
Then it was time to add the lining for the front and the back panels. The lining will help inserting the busk at the front and creating the eyelits in the back. It also hides the raw edges.

I cut those panels from black cotton and then hemmed the inner side first, to prevent raw edges.
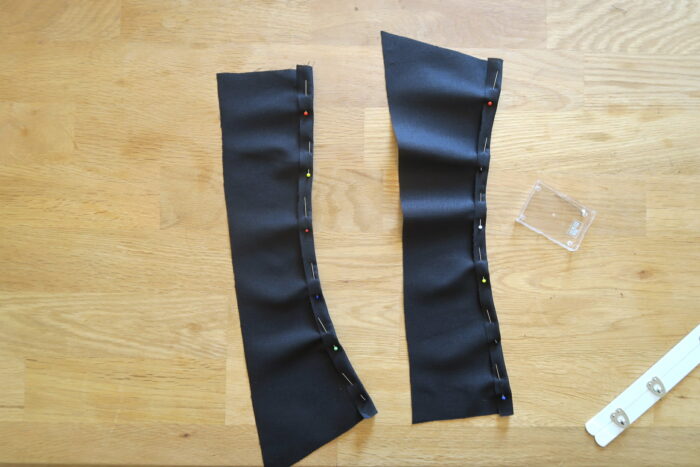
Then I sewed them to the front and back panel with one centimetre of seam allowance, ironed the seams open and turned the lining panels. I pinned them down at the top and bottom. At the moment, they are still loose but they will eventually be sewn down when I bind the corset.
To insert the busk, I started with the side, that has the knobs. I placed it under in the position I wanted it and marked where the knobs are with some chalk. Then I poked the wholes using an awl and inserted the busk. After that, I sewed around the busk as close as possible, using a zipper foot.
For the side with the eyelits, I first marked the placement using the other side as a guide. Then I pinned the busk piece in place and marked with chalk where the eyelits are. After that I cut slits of about a centimetre where I marked the fabric and used some fraycheck to prevent the fabric from fraying. I did iron the lining a bit further back and folded the coutil sligthley, so the slits would be in the coutil layer, not the seam or the cotton layer.
After that, I also pinned the busk and sewed around it as close as possible using my zipper foot.

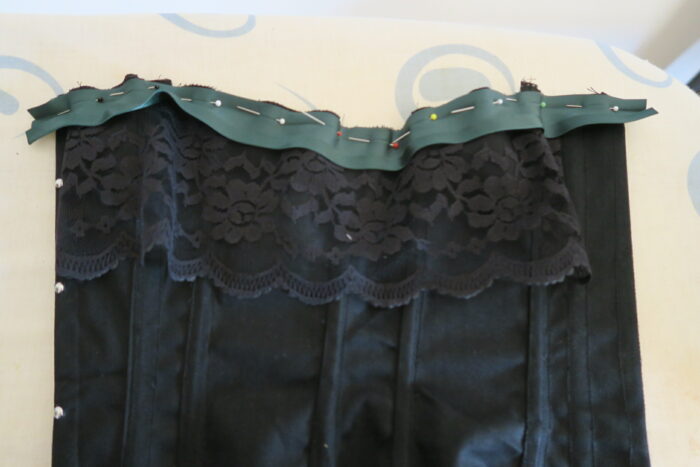
At this point, most of the work on the 1890s corset is done. I continued by adding lace and bias binding the raw edges at the top and bottom.
I pinned the lace and the bias binding at the same time. Then I started to sew down the bias binding by hand using a back stitch. After finishing, I turned the binding over the edge and pinned it again. Then I used whipstitches to secure the binding on the inside.
To make it lay flat, I sewed the lace down in several places with a few stitches. I also purposfully left out the back panel, because I did not want my eyelits going through the lace.
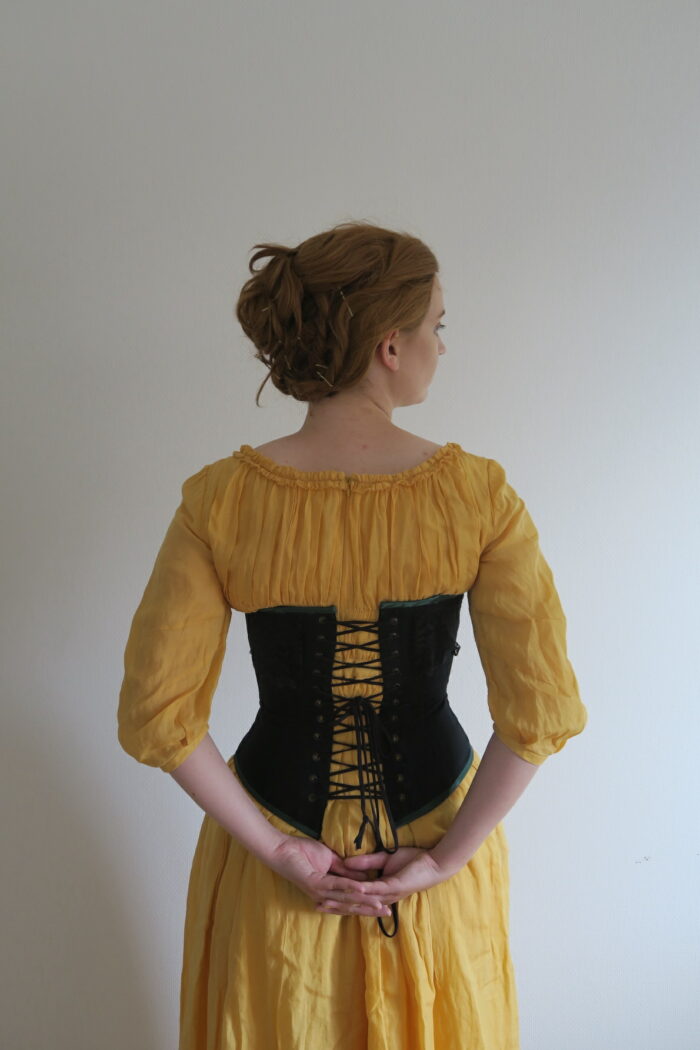
After that, I added the metal eyelits after punching the wholes into the fabric. Then I inserted the cord and my corset was done 🙂
Some pictures of the finished corset from the front:


And from the back:
And that’s it for today’s post! Thanks a lot for reading, I hope it was helpful and you had some fun! I wish you a good one and I’ll see you in my next post.
Love
Ella