Hello everyone 🙂 I initially intended to go on with something from the 19th century, but a sale in my local fabric store blew all my plans away. I found a piece of the most gorgous greyish blue striped fabric, that immediately screamed 18th century to me. So I bought it, eventough it is only a piece of 160x140m. Now I have some plans for it and these require Pocket Hoops.
Which means that I changed my plans and am still wandering through the beautiful 18th century. If you are interested in 18th centruy fashion, I have more posts here:
Now, let me discuss some more details on my current project.
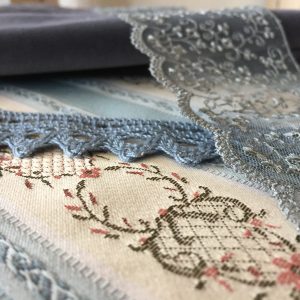
At home I went through my stash and found two pieces of cool grey velvet, that match perfectly as well as two different blue laces, 4m each. The plan is to squeeze a jacket and a skirt out of these materials… Eventhough it is not that much. Like always. Many bad decisions… But just look at that colour palette! I love this kind of icy greyish blue. It reminds me of the northern sea.
I really want this to work out, even if I have to compromise. Let’s start with my desired design. I calculated and if I piece the back of the skirt together, I should have enough of the velvet for a hat and hopefully gloves. More problematic is the jacket. I have no idea how much fabric this will take. The fabric is striped, so I cannot really use its full potential unless I let go of the idea of using the pattern as a part of the design. The thing that I would love to make is a French Jacket or a Pet-en-air (I love the french and their talent for naming things… this is hilarious). Basically a short saque gown:
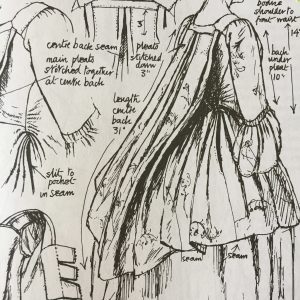
This is taken from Nancy Bradfields “Costume in Detail”. I have a slight feeling that I do not have enough fabric for this… But I decided to pattern it anyways because I want that pattern. Then I’ll make a mock up for the jacket. If it fit’s I”ll see if I get anywhere with my fabric. And if it is not enough, I’ll make a caraco jacket:

This one is featured in Janet Arnolds “Patterns of Fashion” and was worn over pocket hoops according to her notes. It would also work for my plans.
Back to the main topic of this post: The first thing we need are pocket hoops. I will wear my stays, my shift and probably also the petticoat I made for my robe à l’anglaise, but I need pocket hoops. For reference I used Nora Waughs “Corsets and Crinolines” as well as the American Duchess’ “Guide to 18th Century Dressmaking”, both fantastic books.
Materials I used:
Yes, maths… well, not really. I just decided what measurements to go for and then calculated how long my ties would be since I did not have that much ribbon etc. So my notes are very messy and corrected, but maybe they can still provide some help.

Since I do not have a lot of fabric for the skirt and the jacket, I shortened the width of the pattern. It is now 50cm wide, instead of the 54.8cm the girls from the American Duchess used. It is also not the same length and my bones may be placed slightley different (I did my own calculations here). I also shortened the ties because, surprise, I did not have enough ribbon… The emergency bias binding ties were not a thing at this point, because I made a mistake with counting the ties… 12 of the shorter ones, not 8 like my sketch wants to make you believe. A well thought through project, isn’t it?
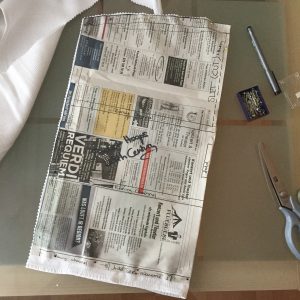
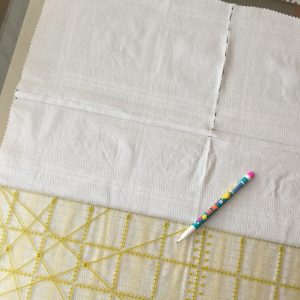
This is the pattern I made with my measurements and calculations. Lauren and Abby’s Book was a huge help with these. They are not that difficult to make, but it helps a lot, if you have something as a reference. I forgot to add seam allowance at the bottom, so I added it while cutting the pieces out.
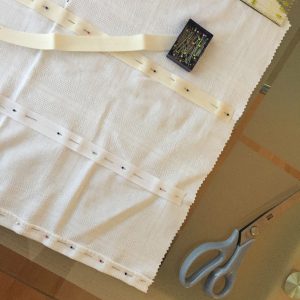
I cut the pattern out twice on the fold (make sure to not cut it out on the bias) from an old cotton table cloth I had around. Then I marked the slit and the boning channels. I did the slit because I plan to make myself a pair of pockets one day and it would be great to reach them through my pocket hoops.
Then I pinned my bias tape on to create boning channels. I would not recommend using bias tape. Ribbon works well, or create your own boning channels. I had nothing else around (I was short on my ribbon and used it for the ties) so I used bias binding because I did not want to spend the extra time on creating boning channels myself. The lowest channel was created with the existing hem.
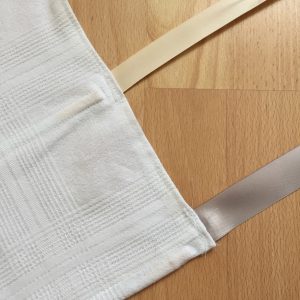
I sewed all boning channels, then cut open the marked slit and hemmed it. Then I inserted the boning. I used 0.5cm hoop wire for these, taped at the ends for security reasons. After all boning was in place I closed the boning channels by back stitching over them several times.
Next were the hems at the side. Then I attached the ribbon that was previously cut into 6 pieces of ca. 25cm and 4 pieces of ca. 40cm. The ties were attached next to the boning channels, for the ones I did not cut out from the ribbon, I used bias tape. The longer ones I used for the bottom boning channel (they were meant to be the ties in the following sentence… several mistakes made here ;)). I had forgotten to cut four additional ties, that would tie the two to each other in the front and back. So, I used bias binding again. Let’s forget about this whole part of the process, I don’t know, where I put my brain this day.
Now there are only the finishing touches left. The top part of the hoops should be gathered, I decided to go with a third of my waist measurement. To finish the raw edges I used some satin bias binding again and also created the waist ties with it. The colour matches the rest of my underwear. And that is already everything for this project. Looking back, they really are an easy make (just don’t leave your brain in the bed like me).
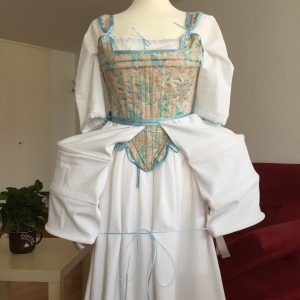
These are the hoops on my dressform together with chemise, petticoat and my stays.
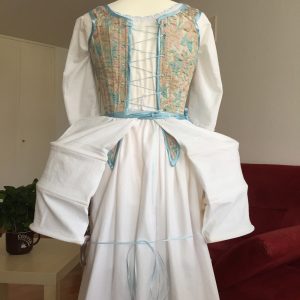
Ant here you see them from the back. The stays are not laced until the last eyelits. I will have them for some time on my dressform and since the eyelits are handsewn, they might tear… And I love these stays. So no tension where not needed and the minimum, where I have to lace it.
Thanks a lot for reading, I hope you enjoyed this post and I wish you a great time.
PS: There’s a little section about the pocket hoops in one of my videos:

By loading the video, you agree to YouTube's privacy policy.
Learn more