Hello everyone. It has been a while but here I am, back with a new project. I am making a robe à l’anglaise at the moment. The idea was to dive into the 1780s with a simpler project, that follows the usual cut and shape before taking up my more elaborate project. To test the ground… My Redingote will be the next in line.
If you are interested in reading how I made the undergarments that I wear beneath the robe à l’anglaise or if you are interested in part 2, you can find everything here:
The fabrics I chose for this project are a beige and white jacquard that I bought 7 meters of on sale from. This will be used for the bodice and train. I hope, that I will have enough of of it left, to make a burgundian gown.
The other two fabrics are from my stash. I decided to use the bordeaux taffeta on the front of the skirt and the red satin in the back. All fabrics used are from Buttinette. The beads I used are from the Bastelzentrum Bern.
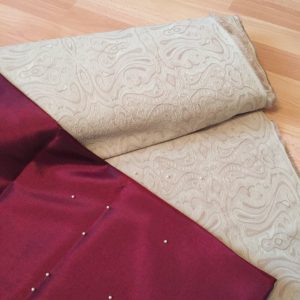
I also chose some matching leftover beads to decorate the dress with. Along with the gown itself I would like to make a hat, a pair of slippers and a choker.
For the dress I settled with a mixture of two designs from my reference books, as well as my imagination. I have no idea, how it is going to look in the end…

On to the good stuff!
For the skirt I used in total four meters of fabric, that I found in my stash. Two of the wine red satin and two of the bordeaux taffeta. Which is not enough, if you want to do ruffles and also use some leftovers as accents on the bodice, as I soon found out…
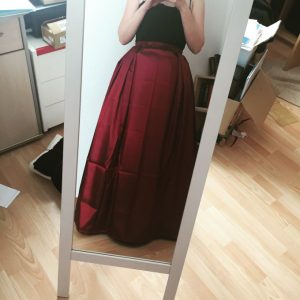
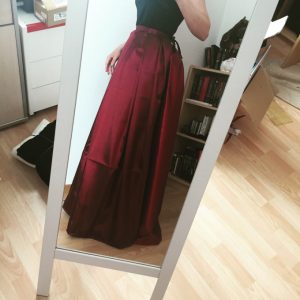
The skirt was drafted on my dressform. The back has 4cm wide pleats across.

The front was left flat in the middle, I only pleated the sides, using double pleats. The dresses of this period have the most volume on the back and sides, the front is normally quite flat. I unfortunately forgot to take a picture of the draped front on my dressform. So here is a picture from a bit later:
All the pleats were secured with a running stitch. Then I pieced the waistbands together. The skirt works the same way the petticoat does, so two waistbands. I attached them like bias tape. Then I cut the hem to the right length and did the hemline by machine. Since I wanted to cover it with a ruffle anyways, it did not bother me. Now it does, since I want to leave the ruffle because I like the pleats. And because I need fabric. I never have enough fabric.
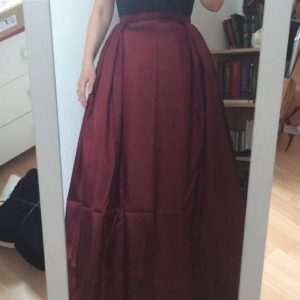
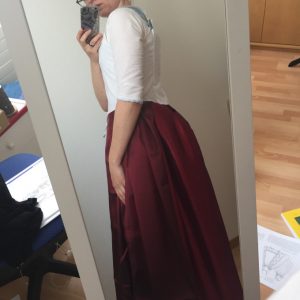
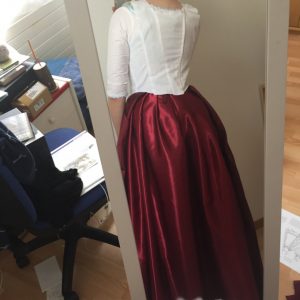
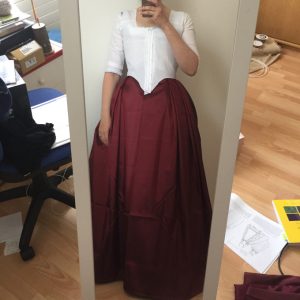
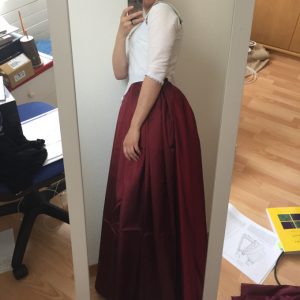
And here are some pictures of the final product.
As you can see in the next picture, my skirt does not have that much volume in the back. Since it is supposed to be a gown from the late 1780s, the bumpad is smaller. It came back in fashion and diminished throughout the 1780s.
Since I’d rather have my decorations on the bodice than a ruffle across the hem, that might destroy my pleats, I at this point decided to let go of the idea.
The last thing I will share with you is the process of drafting the bodice pattern and making the mock up. Since the shilouette of my dressform does not match mine while wearing stays etc. I wanted to make sure the pattern works. Also, I will use it as a guideline for my redingote later on.
I drafted the pattern as said on my dressform and cut out all pieces nicely afterwards. This is what I came up with. The backpiece will be cut on the fold, all the other pieces will be cut out twice. I know, that this is not accurate, a centre back seam would be more appropriate 😉
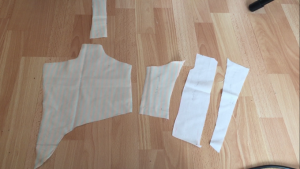
After adding seam allowances and lengthening the back pieces a bit, I ended up with this:
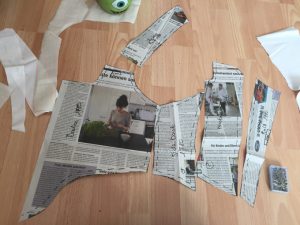
These pieces where cut out from some leftover white cotton and sewn together with a 1cm seam allowance. Then I tested the fit over all the other layers (I laced my stays myself… my poor arms…)
The alterations that had to be done are quite obvious on the pictures. There is too much room in the waistline and the strap situation did not really fit. The front panel is also to broad, I ended up cutting 1cm off where the closure will be.
Here are some pictures of me wearing the mock up after the alterations over stays and everything. I did not alter the front panel, so here you can see, that I had to take it in too.
I am pretty comfortable with this project and absolutely in love with the shilouette! Hopefully, I can finish my robe à l’anglaise within the next week.
That’s it! Thanks a lot for reading, I hope you enjoyed.
PS: Here’s the video going with this post on YouTube:

By loading the video, you agree to YouTube's privacy policy.
Learn more