To go with my recently finished caraco jacket I made some 18th century accessories. Since the colours are on the cooler side and the whole ensemble reminds me of a cool and stormy day, I decided to make more wintery accessories. So, if you’d like to read how I made my handmitts, the hat, the choker as well as the fichu, keep on reading.
Should you be interested in how I made the skirt and the caraco jacket that go with the accessories, you can find the posts here:
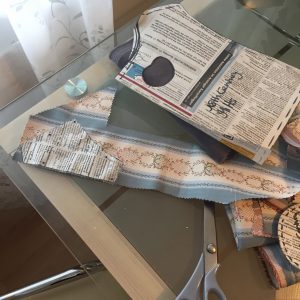
The fabrics I used for the jacket are from Buttinette (the cotton lining) and from the scrap section of my local fabric store Modesa (blue striped polyester). The beads, fake flowers and feathers are from the Bastelzentrum and the lace was bought on the market in Italia. For the accessories, I was really short on fabric. It was already difficult for the jacket and the skirt, but for the accessories I had to get creative with piecing.
Let’s start with the handmitts:
Time for some accessories. The Caraco Jacket and the skirt would be considered quite boring without some more ruffles and flounces. Let’s start with some handmitts. Handmitts were fingerless gloves, worn to protect the skin from elbow to wrist that was often bare due to the fashionable shorter sleeves. Since my colour scheme has a stormy and cool vibe I thought they would fit in really nicely.
As a reference for the pattern of my hand mitts, I used the book “Costume Close-Up”. There is a pattern for mitts in there. I tried it myself at first, but failed, so I decided to go back to a reference 😉 Here is what mine in the end looked like:
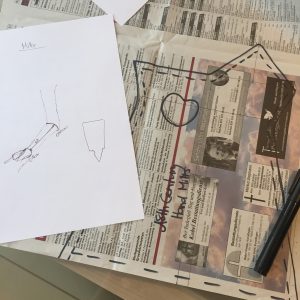
I made a mock up and corrected some things. As you can see on the next picture, the whole for the thumb is bigger and I changed the top part of the mitts as well as the left side (on the pattern). I also changed the position of the wrist and made them a little wider because I could barely get them on.
The pattern is ready for download here, if you are interested.
After all of these corrections, I cut all pieces out from some of the remaining pieces of my fabric. I managed to more or less cut the pieces that were the blue stripy fabric the same, so the mitts would look nice and the same. For the velvet it was no problem, but I would start with the hat next time, the lining for it was pieced like cracy to get it out of the remaining velvet.
Step number 1 was sewing the lining of the tips onto the mitts. Just sew the two layers together, right sides facing each other. Note: I did not sew down the sides as well as the bottom. Bottom and right side (on the following picture) were sewn down by hand later on, the left side will be part of the mitts seam. After sewing on the lining, I turned them, right side out.

Next I did the side seam. I planned to use 1cm of seam allowance and also used it for my first seam, for the second however, I changed to 0.5cm because I noticed while trying on that it was still a bit tighter than planned.
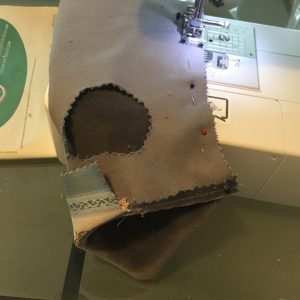
Then I sewed the raw edges of the tip lining down with whip stitches. I also finished the thumb part by hemming and sewing it together. This was the next thing: Adding the thump piece to the mitts. My fingers bled a little while doing this. I decided to sew this piece in by hand and half way through, I took out all pins for my fingers sake. On the picture you can see, that the pieces were sewn together right sides facing each other.

After sewing the mitts together it was time for decoration. I decided to use some of the leftover lace as well as beads. I also used some lace to make the mitts a little bit longer, because they turned out to be a bit too short. And that is already it. I used pinking scissors to cut out all pieces which is why I left most edges raw, they will probably not fray that easyli. So the insides aren’t too pretty, but I like the outside.
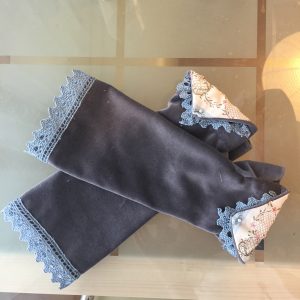
That’s it for the mitts. Mine are a bit too short, they do not cover all the skin up to my elbow which is unfortunate. But they are still nice and make the whole outfit complete. The next thing I made was the choker.
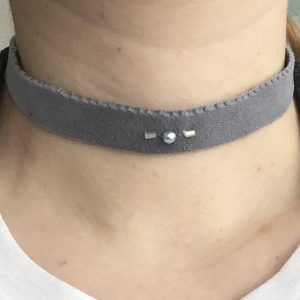
This is my favourite, it took about half an hour. Just cut a stripe of fabric (if it doesn’t fray, if it does, better cut double the sice, add seam allowance and do it properly), add snapps and then decorate it. Really simple and quick. This is how mine looked like in the end:
The next thing I decided to make was the hat to go with everything. Becaus, let’s be honest, every outfit looks ten times better with a hat. So, I decided to add one to my 18th century accessories.
Last time I used buckram to construct the hat, this time I tried interfacing. And I have to say, it is so much easyer, I will probably not touch buckram anymore. Here are the materials that I used for the construction of the hat:

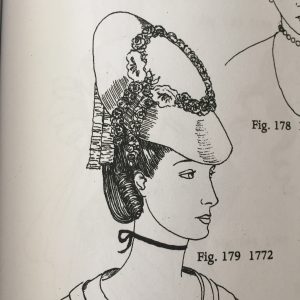
My inspiration picture is from Georgine de Courtais “Women’s Hats, Headdresses and Hairstyles”. I did not end up wearing it like the lady pictured (mostly due to my non-existant talent for doing my hair), but I really liked the oval shape (well, it is not oval, I think this hat is round. But I liked the idea of an oval hat).
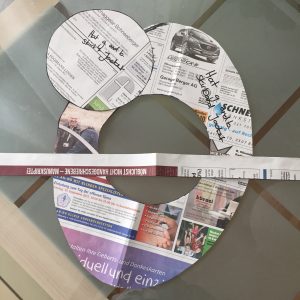
The pattern I came up with looks like this:
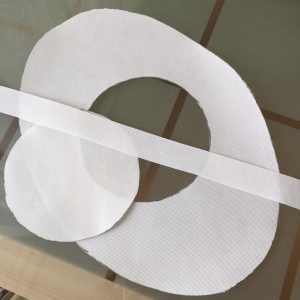
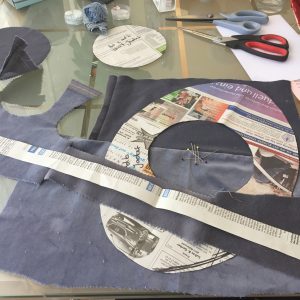
I cut the pattern out from interfacing as well as the fabric, adding seam allowance while doing it.
Then I started to cover the pieces with fabric. I did not want to have visible stitches, so I did my first piece using a running stitch and secure the fabric by pulling the thread tight (like gathering). But this would not work for the long piece and it would also be difficult for the brim as well as sewing the pieces together. So I gave in and secured the fabric with some small stitches to the interfacing for the other two pieces.

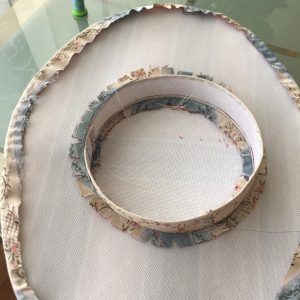
Then I started assembling the hat using tiny whip stitches through both layers of interfacing.
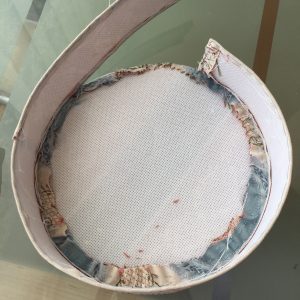
Attaching the brim was a bit difficult, I must have made a mistake while cutting the pieces out. The crown of the hat was a bit smaller than the whole I cut into the brim. Which resulted in some gaps (that I have hidden behind fake flowers and feathers). I was able to concentrate the gaps in the back where they would be hidden by the rolled up brim or decorations though. The lining also helps with that.
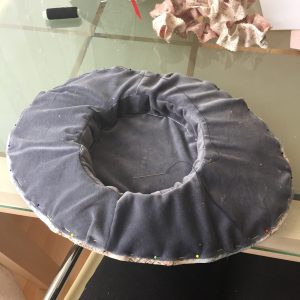
Speaking of the lining… That was difficult. I had to piece the rest of my velvet together to be able to cut all pieces out. Also I am not that happy with using the remaining velvet because it looks quite bulky in the end. I did iron all seems but still it was difficult to cut out and also does not look too nice in the end. Thank god it is not that visible.
Here you go, that is how the lining looks like (here it is pinned on, there are less wrinkles but still wrinkles…). The lining was secured with running stitches on the inside and whip stitches around the brim.
I finished my work on the hat by turning up the brim (I secured it with a few whip stitches) as well as decorating it. At a local store I bought some blue feathers as well as roses in red and blue and also added some of the beads that I used on the stomacher, choker and mitts.

I am not 100% happy with this hat, because I do not like the front part of the brim that much. But at least it is much more stable than my last try.
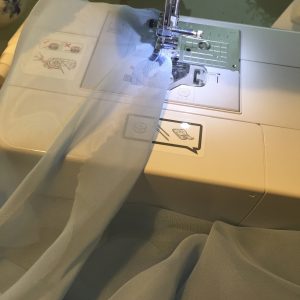
The fichu was a fairly quick make. I just cut a square out of some chiffon I had in my stash. Then I made rolled hems all around it. Let’s not talk about my hems. They aren’t that pretty and not at all small. I decided to save some time here sincethe hems would not be visible. So here the glorious thing is:
Aaaaaand with finishing the fichu, I am done with all of my 18th century accessories and therefore finished my outft!

And thats it! Thank you so much for reading, I hope you enjoyed and I wish you a good time.
PS: There’s a video on YouTube, talking about everything while I’m dressing up 🙂

By loading the video, you agree to YouTube's privacy policy.
Learn more