Hello everyone 🙂 Welcome to part 2 discussing my grey velvet skirt and caraco jacket. My last post was a bit on the negative side… I still do not feel 100% sure about this project, but I like how the jacket and the stomacher turned out.
If you’d like to know, how I made the undergarments for this project and how I constructed the jacket, you can find information in these three blogposts here:
The fabrics I used for the jacket are from Buttinette (the cotton lining) and from the scrap section of my local fabric store Modesa (blue striped polyester). The beads are from the Bastelzentrum and the lace was bought on the market in Italia.
Ok, that’s enough, let’s start with the good stuff.
For the stomacher, I decided to use a base layer, made from cotton as well as the grey velvet. It is fully boned (I used some light plastic bonig I had around). Unfortunately, I did not take that many pictures while sewing, I am sorry.
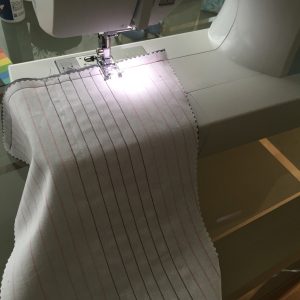
The first step was to sew all boning channels. I marked the channels using a ruler and a pen, then I sewed along the lines (and I closed the channels on one side):
After that, I inserted the boning. As already mentioned, I used plastic boning and I filed and taped the ends for security. Then I closed all channels. Since the edges were raw, I decided to make bias binding out of the velvet (which wasn’t a great idea since the edges are quite bulky now). I am not sure, if the vertical boning channels are the best solution, I guess, doing diagonal channels too like I did for my stays would have been a better option.
After that step, I already started decorating it. I used two different laces. The lightblue lace was gathered and then sewn on with a running stitch along the gathers. I also did some stitches to secure the ruffles in place. Then I used the darker lace and placed it over the gathers, hiding the stitches. This one was also sewn using a running stitch. This stitch was then covered by the lightblue ruffles and so on…
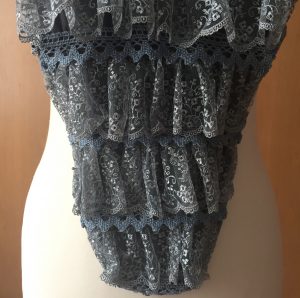
To decorate the top, I used two rows of the darker lace as well as some beads.
My last step was using some lining fabric from my stash to hide the lines of stitching.
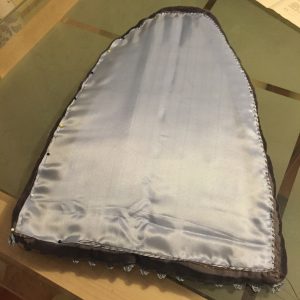
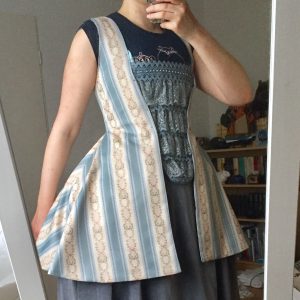
In certain light, the stitching lines are still visible, but I think, it looks much cleaner than before. I sewed the lining down with whip stitches. And this is the final result:
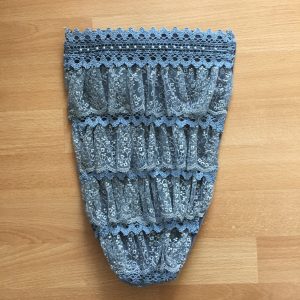
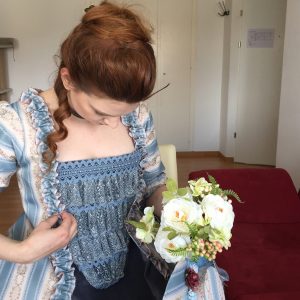
I did not add some additional ribbon to secure the stomacher on my stays but might end up doing it in the future. It is a bit difficult to secure it with the pins right now.
And that is already everything for the stomacher.
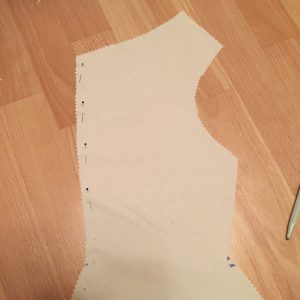
To make sure, all corrections for the pattern that I drafted in the previous post were ok, I decided to make a second mock up. I am happy I did, because the sleeve pattern still needed some alterations (I procrastinated on the sleeves until I really had to make them) and I also made some smaller changes at the waistline and the shoulders.
Then it was time to start assembling my jacket.
I started by assembling the lining. I sewed all seams with 1cm of seam allowance and then ironed them open. The sleeves were not sewn in until later and I also did not line them. As you can see, I marked my waistline on the fabric. This makes sure that the boning, that we are going to insert, is not too long.
Next were the boning channels. I created them using some scraps. I folded the edges inwards to prevent the channels from fraying and then sewed them on.

Then I inserted the boning. There are three bones, two at the sides and one in the center back. They are all filed and taped for security. I used plastic boning for this too.
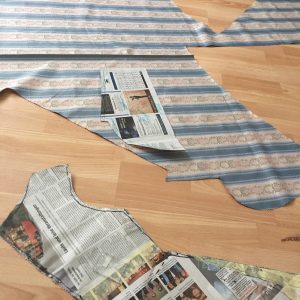
After assembling the lining, it was time to cut out the jacket from my beautiful fabric. I managed to cut all pieces out and (more or less) match the pattern, there was just a small edge where I had to piece it.
The difficult part was to try and match the seams while sewing. I used a ton of pins etc. but I also couldn’t match the pattern perfectly after my second try. This might be the reason because I made a mistake while cutting out. But anyways… This is what the back seam looks like:
Not perfect, but close enough for me. I decided to not attempt matching it a third time. Because that would have been frustrating. And probably not worth the time and nerves spent.
This is the top layer assembled after ironing all seams flat:

The next step was sewing the top layer and the lining together. This worked pretty well, I only had to make a small pleat in the lining at the bottom, because it was a bit wider than the top layer.

The arm openings were not sewn together, I had to turn it the right way out somewhere and at this time I thought, that I could maybe use the lining to bind the raw edges where I joined the sleeve with the toplayer. And this is what it looked like on after assembling top layer and lining and iron it once again:
The last step was drafting the sleeve pattern. I drafted about 5 patterns… In the end, I gave up and took the one I liked most. It was a bit too wide at the arm opening, a problem I solved with a box pleat at the top. I actually really like that pleat there. The sleeves were sewn in by hand and I used satin bias binding to bind the raw edges (I did not have enough seam allowance to use the lining to bind them.
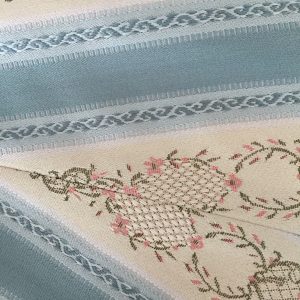
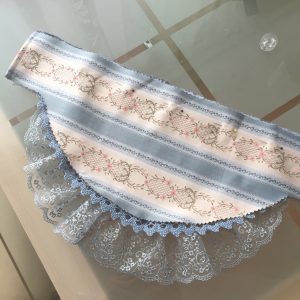
Then it was time for sleeve flounces. I used the Americhan Duchess’ “Guide to 18th Century Dressmaking” again and I love the flounces. They are not that big because I didn’t have that much fabric left. But they are pretty… After cutting out all pieces from fabric, I decorated the grey velvet piece with some leftover lace:

Then I joined the two layers and gathered them at the top:
Sewing the flounces onto the sleeves was a bit of a pain, I have to say, but I adore the outcome, it was worth my bleeding fingers. I even managed to match the pattern here.
The last step to finish the jacket was sewing on ruffles around the neckline. I had to piece the ruffle together from 18 small stripes of fabric! I decided to use the blue parts of the fabric because I thought, it might look less harsh against the stomacher.
This is a picture taken in the city of me casually wearing my jacket 😉

And that is it for the construction of my caraco jacket!
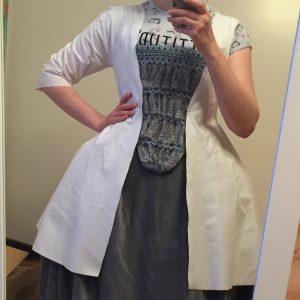
I have already taken some pictures of my finished caraco jacket and the skirt and accessories going with it. Excuse the background. I did not have the time to go outside and take pictures and my photo edge is not yet finished. So my living room had to do the job. Here we go:
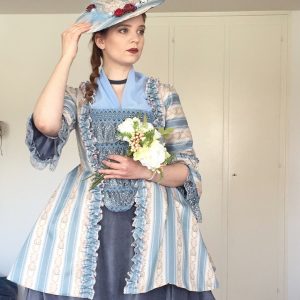
My hairdo was inspired by Georgine de Courtais “Women’s Hats, Headdresses and Hairstyles” and I liked it. It is no recreation, I did what I could (I am quite bad with hairstyles…). For my make up I went a bit heavier than my everyday make up and used a lipstick that matches the roses on the hat. That’s all :). While I did my little photoshoot, I always had to pin my jacket onto the stomacher…. Pins are not for me 😉
As you can see, next to stomacher and jacket, I have also finished a fichu, a pair of handmitts as well as a hat. Since I documented the process quite detailed with pictures and everything, I will do a seperate post for the accessories. If you are interested in that, stay tuned.
Thanks so much for reading, I hope you enjoyed and I wish you a good time.
PS: I made a video about this ensemble 🙂

By loading the video, you agree to YouTube's privacy policy.
Learn more