As a part of a renaissance costume that I planned, I recently finished 16th century stays. I used a pattern from Janet Arnold’s “Patterns of Fashion 3” as a guideline but altered it, sacrificing historical accuracy for practicality. This won’t be a 100% historically accurate project anyway as the dress will lean more towards the 15th century but not be an exact replica of anything worn in the time. I’ll combine it with my own fantasy.
If you are interested in the costume I made to go with these stays, you can have a look on it here:
Let’s start with making the stays. For getting an idea on how to sew it, I watched Angela Claytons video on making a 16th century kirtle. This was so helpful! If you want a detailed report I’d really recommend it to you. I’m not going too deep, just mentioning the steps and what mistakes I made.
For this projects I used two layers of taffeta, some crushed black velvet for the top layer as well as some lining fabric. The eyelits were handsewn using embroidery floss and I used a satin cord for the lacing. All materials are from Buttinette (www.buttinette.com)
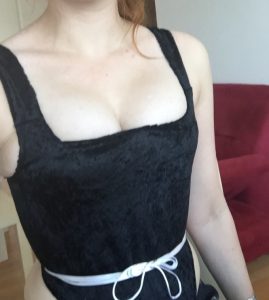
This is what it looks like in the end. It does exactly what it should.
Let’s start with the process of making it. I started patterning with the help of Janet Arnolds above mentioned book and than adjusted the pattern with the help of my dress form.
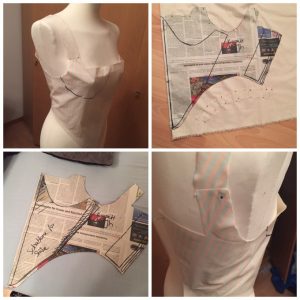
After finishing the pattern, all pieces were cut out twice from a non stretchy fabric for the base layer. Then I used the stencil I made to mark the boning channels and started sewing them. afterwards, I inserted the boning. I made several mistakes here. The piece in the center isn’t as wide as it should be and the rest of the boning is not stiff enough. But it still works somehow… Which is great!

After finishing this step, I filled the bust parts with stuffing material. I wasn’t careful enough while sewing the boning channels and sometimes stopped to late which caused me some problems here, as I could not fill the whole area as planned.

After finishing the baselayer I pinned the front layer onto it and sewed it down by hand.
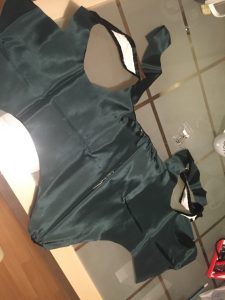
Then I added the lining and also sewed it down by hand.the last step where the eyelits. I used black embroidery floss and for being my first time, I think they turned out pretty well.
And that is all 🙂 The stays fit and work eventhough I made several mistakes, which makes me really happy. Now I’ll start with the dress. Thank you for reading.