Hey everyone 🙂 Already the third post on my renaissance inspired costume. It makes me happy to blog about my progress. It is a nice documentation of my learning process and helps me a lot. In this post I’ll work a bit on everything. I got further with the coat but also did some work on the dress.
All fabric for this project was bought on buttinette.com. The sequins are from a local craftstore and the beads as well as the beautiful rose pendant are from Bastelzentrum Bern. The trim is from Spitzen und Borten and the clasp is from Etsy, but I really don’t remember the seller.
If you are interested in other posts on this project, you can find them all here:
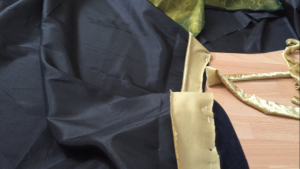
I finally decided to work on the hem of the dress. The fabrics were fraying like crazy and I wanted to do the hems before I destroy something. To keep the length, I decided to make bias tape out of golden velvet and bind the raw edges just as I did with the neckline. I think of using the same method to bind the raw edges of the sleeves too to repeat the element.
I cut out two stripes of golden velvet and sewed them together. While pinning it to the hem I noticed, that the seam of the bias tape would be visible in the front. So I decided to cut the stripe in two pieces. I placed the new hem where the black tafeta is sewn to the organza and satin. I now have two seams, but both will be hidden by the coat, so it does not bother me too much.
I pinned the stripes on and sewed them down with a running stitch, which took quite long. I learned to love watching series while hand sewing… At the moment I’m watching the third season of ,Sleepy Hollow’. A friend gave it to me and it’s quite good. But back to sewing :).
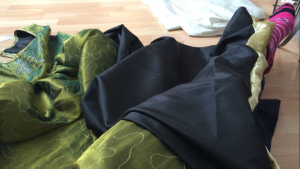
Then I pinned the rest of the velvet to the other side and used a herringbone stitch to secure it. My stitches in the front turned out to be uneven. Not happy with that. I have to work on this. As most of the mistakes will be hidden it is ok, but I want to put more effort in it in the future.
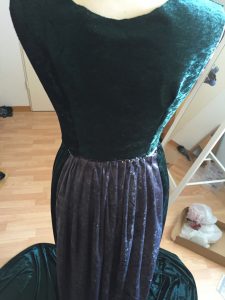
After that I decided to move on with the coat. I cut out three panels from the green and grey velvet for the coat and sewed the three pieces together, the grey one in the middle.

I went on by pleating the skirt of the coat and secured the pleats to my dressform.
They are not 100% even but I really like how they look. As I didn’t want to destroy my pleats, I sewed them together on my dressform and then took skirt and bodice off and sewed them together by hand. Afterwards I cut out the lining and sewed on the trim that I also want to use on the sleeves.
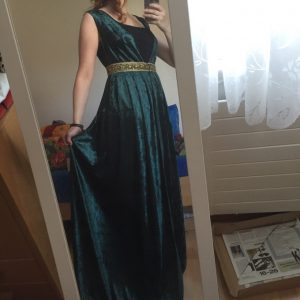
I put the coat back on my dressform and shortened the length until I liked it. It has a nice train of about 30 cm now. The fit is good, even without the stay /corset thing I created (more or less made up) to get the right shilouette underneath. I love the colour and the way the fabric falls.
I started cutting out the lining only to notice, that it does not match the bodice of the coat. It’s too short! I cut the bodice on the bias and probably it got longer due to tension. So I have to do this again. But I have put it aside for the moment to start with the hood.

The hood was sewn together by machine and I used four layers of velvet for it. I wanted the lining, that would be visible also to be made out of velvet. After sewing all pieces together, I sewed it on by hand. I made several small mistakes but they should all be fixable. The only thing that worries me a bit are the folds that sewing hood and bodice together created… I hope they will vanish once I wear it as my shoulders are wider than my dressforms. Or they might also vanish as soon as I add the grey velvet as some sort of sleeve that will create some tension.
It doesn’t look as bad as I thought first. I especially like the way it looks from the back.
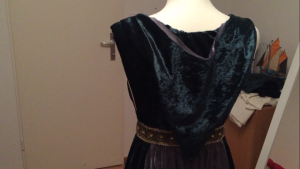
Here you can see the back and the folds I just spoke about. Other than that I really like how the hood looks. It is not functional but helps the shilouette a lot.
The next post will probably be the last one on the construction of this project. All I have left to do is constructing the sleeves. The rest is sewing in the lining, hooks and eyes, do all the remaining hems etc. I want to make a tassel for the hood using beeds and also a necklace. But other than that my renaissance inspired costume is pretty much finished. i know, hese are the most time consuming tasks… But I can see the end and really look forward to wear this dress outside and take fotos of it :). Thanks a lot for reading, I hope you enjoyed.