Hello everyone 🙂 Todays post discussing my renaissance inspired costume will be about making the dress’ skirt and about the construction of the bodice and skirt of the coat that goes with the dress. I initially wanted to proceed with the sleeves but I’m somehow afraid of them and procrastinated…
All fabric for this project was bought on buttinette.com. The sequins are from a local craftstore and the beads as well as the beautiful rose pendant are from Bastelzentrum Bern. The trim is from Spitzen und Borten and the clasp is from Etsy, but I really don’t remember the seller.
If you are interested in all the other steps, that went into this costume, you can find all posts here:
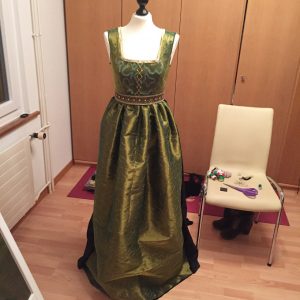
Well, let’s start with the skirt. As said in my previous post I did not have enough black tafeta and had to use satin in addition. This also was the case for the skirt. I used almost all of the black tafeta and satin on the skirt to get the fullness I wanted. The tafeta was used for the two back panels and the satin was paired with the rest of the green golden organza, that I’m also almost out of… Making the sleeves will therefore be even more fun, as I am limited fabricwise… But anyway, I’m really happy with the skirt!

I also did decide to make a waistband. Out of black tafeta and satin, I used some of the black velvet I had left underneath the organza. This dress will be made out of a ton of different black fabrics… After cutting out the pieces for the waistband, I sewed together the three panels of the skirt (tafeta shifts…) and used a zig zag stitch to prevent the seams from fraying. Then I gathered the skirt.

I did this by hand and the middle part was quite difficult. After gathering the skirt, I attached the waistband to the bodice and then the skirt to the waistband. I also did this by hand and because there was so much fabric it turned out to be uneven which bothers me. I’m not happy with the quality of work on this. It will not be visible because of the coat but I am still not very happy.

I played with trimms to cover my sloppy work, but in the end decided against using it. It would add unwanted bulk to the waistline. So I went on and tried to make a pattern for the sleeves, which was a complete fail.
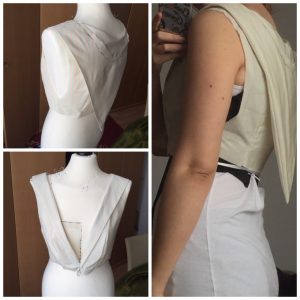
So I procrastinated and draped the bodice of the coat instead.

I sewed a mockup because I was not too sure about the fit. I liked the pattern and only had to alter the front darts and one part of the hood. So I cut out all pieces of the bodice and sewed them together.

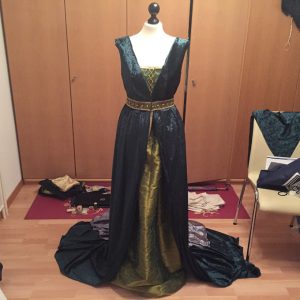
I put the dress on my dressform, then the coat’s bodice and started draping the lower part of the coat. This combination of forest green and grey velvet and the pleats I draped really is to my liking. I love how everything is coming together. This past week I failed different times but i still am happy with what I have accomplished and that my renaissance inspired costume is slowly coming together. I hope to be able to work on the sleeves and the lining next week.
Thanks for reading, I hope you enjoyed 🙂
Contact me over Instagram: