Hoi zämä and welcome to the second post about my 1910 project which will focus on constructing the skirt. For all of you who are new, you can find my first post about my reference dress, my initial construction ideas as well as the materials I use for this project here. If you are interested in all my previous posts for this project, here you go:
In case you prefer to watch a video instead of reading this post, I have one up on youtube for you 🙂

By loading the video, you agree to YouTube's privacy policy.
Learn more
Ok, just as a reminder, here is what we are working with:

If you go directly to the museums page, you can zoom in pretty well, the pictures are of good quality.

So. We have an underskirt and an overskirt. The hem of this underskirt is very narrow. It looks as if it is made from two whole panels that are joined by seams, but the seam stops a few centimetres before the panels finish… The edges of the front skirt panel are turned to the outside and a bit longer than floor length. So the seam could be sewn until about a centimetre above the floor. Here’s my sketch for better understanding, I am bad at wording things like these:
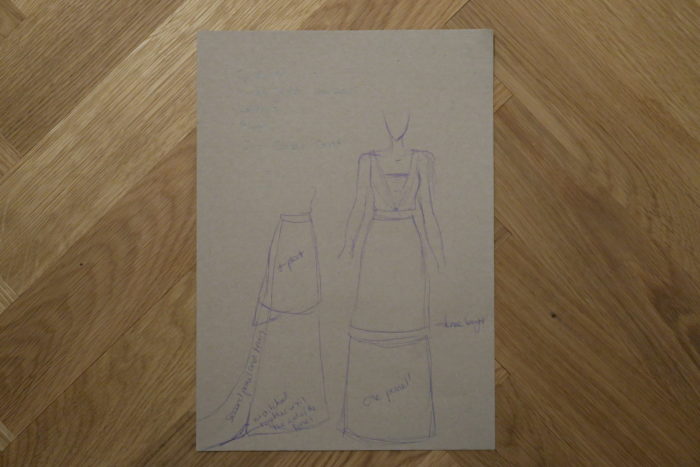
This means that the panels need to be hemmed all around, maybe even lined, at least the train. This will also help to make it “fall” nicely, since it will have a bit more weight.
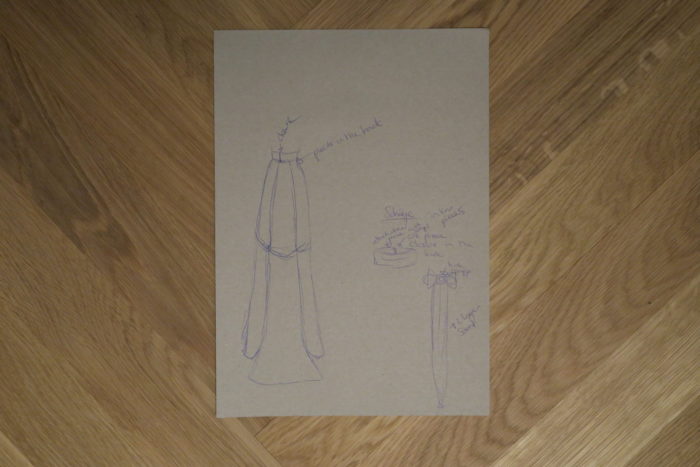
The overskirt seems to have a slight high-low hem and has two pleats in the back. The pleats do not seem to allign with anything. I don’t think, that this overskirt is also hemmed together with the train piece…
It could be, that overskirt and train are actually the same piece, I cannot really tell for sure, but I decided to go with the over- and underskirt solution first, and see where it leads me to.
At about that point I noticed, that my dressform does not really have a behind… I think, for projects like this, she needs to be stuffed. Because I am missing 10 cm, around the equator. But all is fine, I will add a part of them to the train, that looks too narrow and hope, that the rest will work out with being corsetted. We will see.
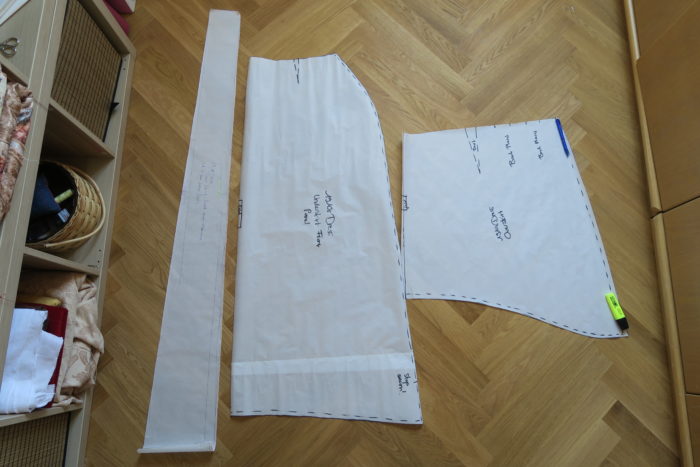
After drafting, I transferred the pattern to pattern paper, evened all lines out and added about 2.5cm to each side of the skirt as well as train panel as seam and behind allowance.
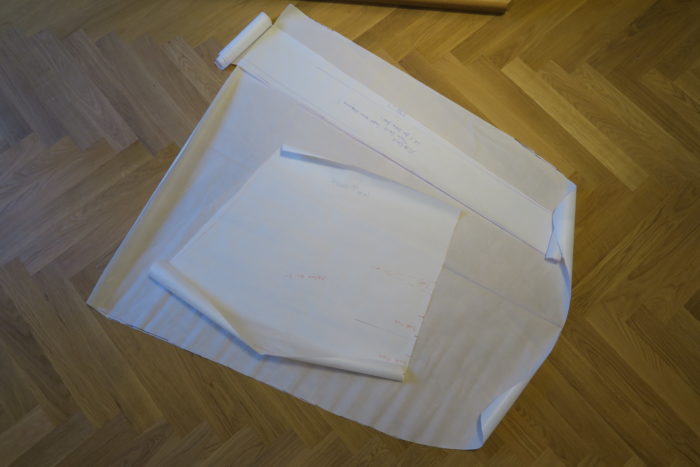
This is what the first draft of the pattern looked like. I cut the train pattern piece in half, because it has to be even. And I think, after doing all the alterations, I will cut the front panel pattern in half too and cut it out on the fold. I did even both sides out here, but cutting on the fold is still my preferred method. Normally, I also draft only in half, but this time, I decided to go all around, because I was unsure how to get it to sit the way it should.
Then, it was time to cut everything out of some cheap fabric (I went with taffeta that i bought on sale. I was not sure anymore, wether I already added seam allowance or not, so I added more and that was a good decision. I also added some more centimeters to the overskirt panel, because I thought, that I had forgotten to do so (spoiler, I did not, but that’s an easy fix.
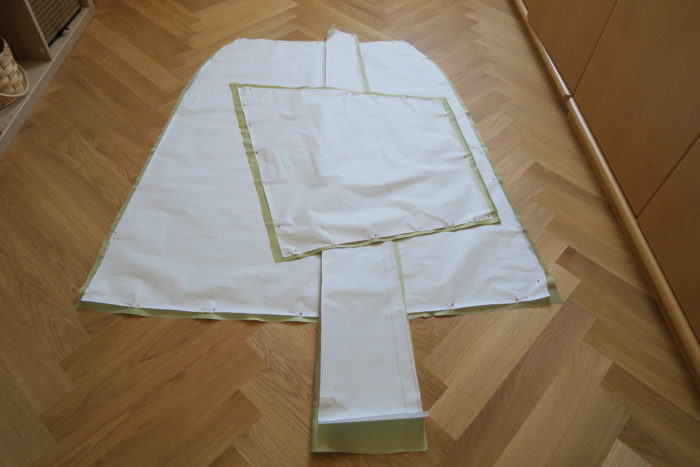
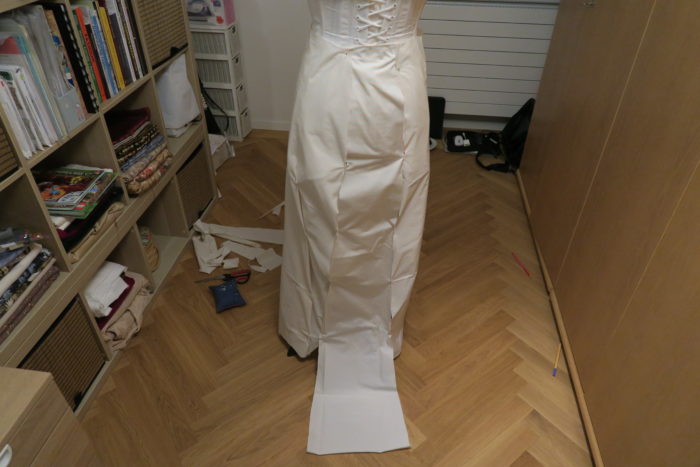
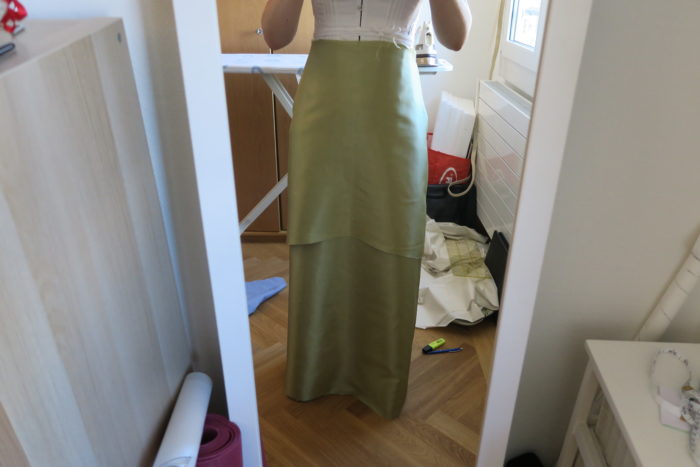
I assembled the panels with half a centimeter of seam allowance (I definitely have to add more to do clean seams). And here it is, my first try:
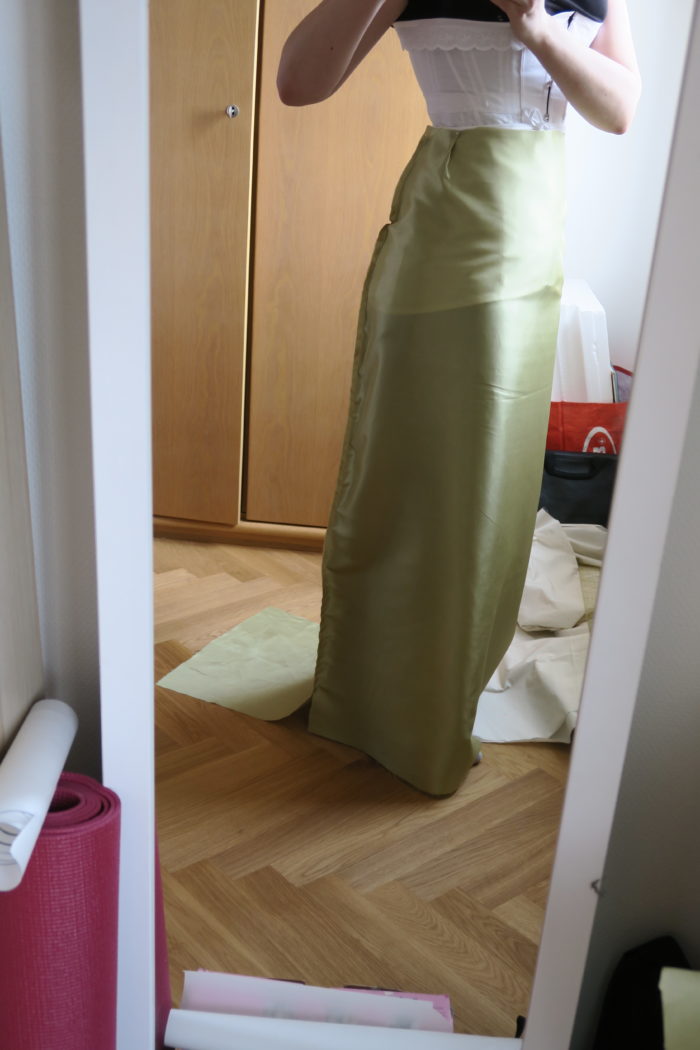
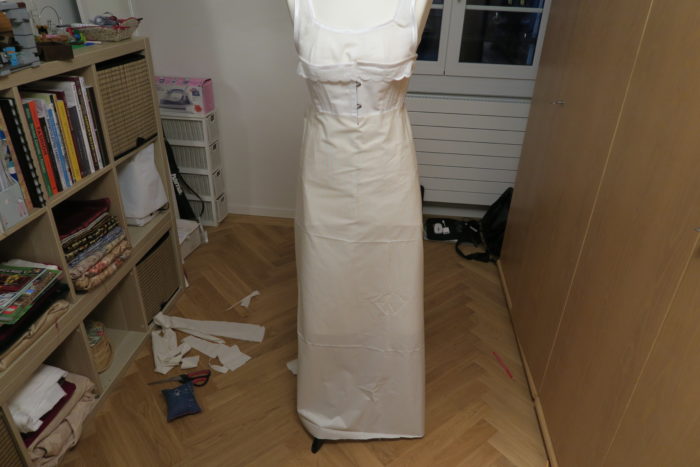
Ok, there are a few things that need to be corrected, let’s start with the front panel:
As you can see on the picture, I added some pins at the waist because it needs to be taken in. Since it will be covered by the overskirt as well as the tulle jacket, I will add tiny darts to solve the problem, it should not interfere with how the skirt falls.
Then there is the hemline. It needs to be longer at the side to allow the edges to fold outwards like the original and I also have to change the front for the effect… I am going to shorten it, so it will be slightely curved like the original, but not as extreme, just enough to not fall over it:
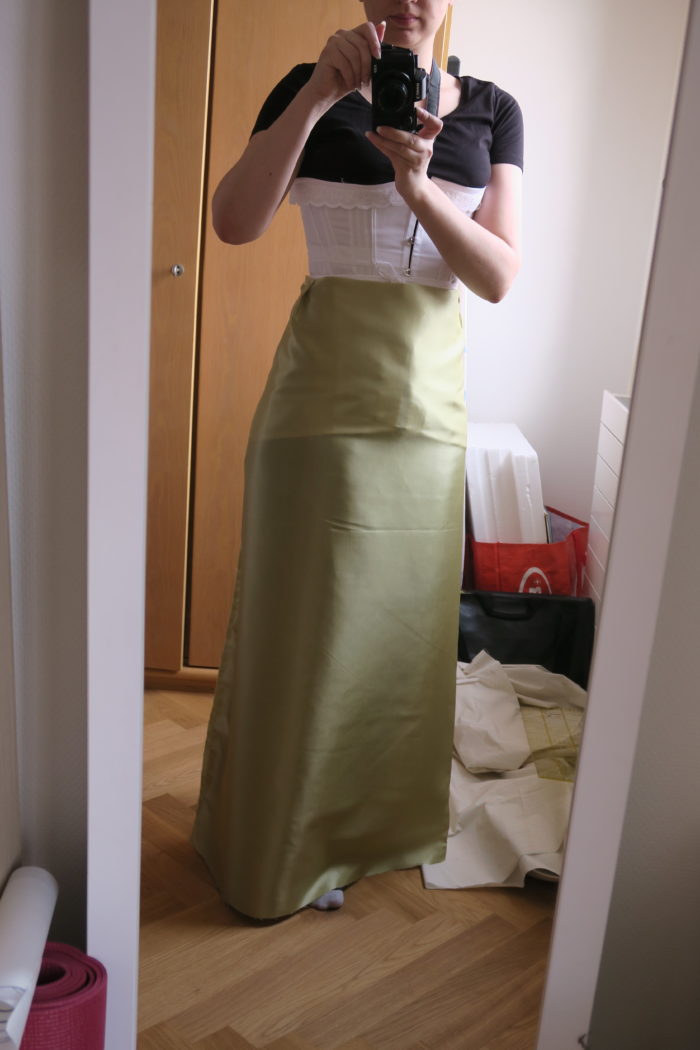
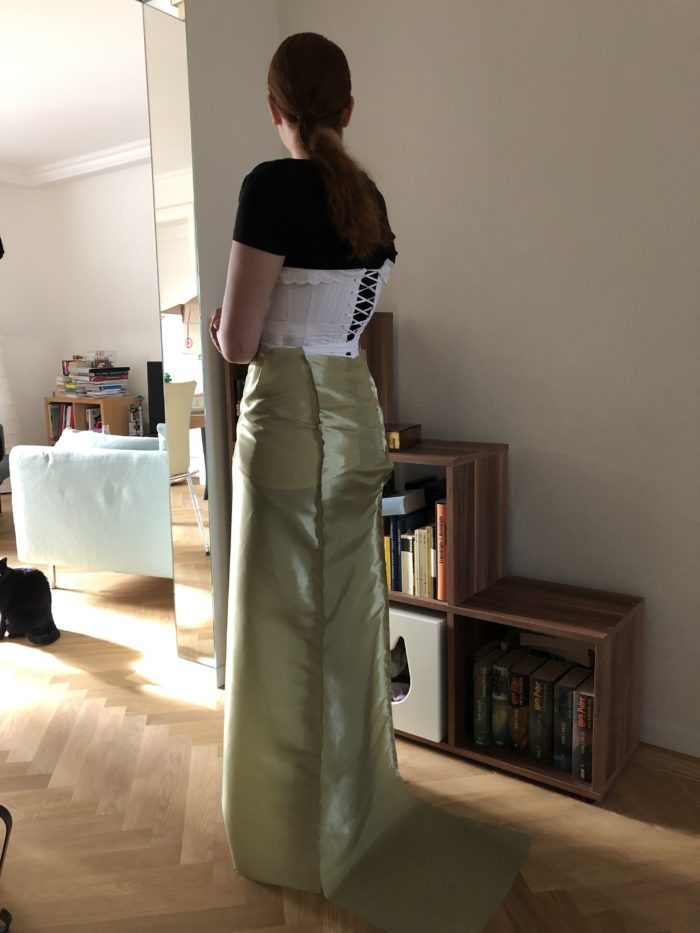
With the backpanel, I am actually happy. The skirt is too tight around my behind though and because of that, the train does not fall straight and folds are building.
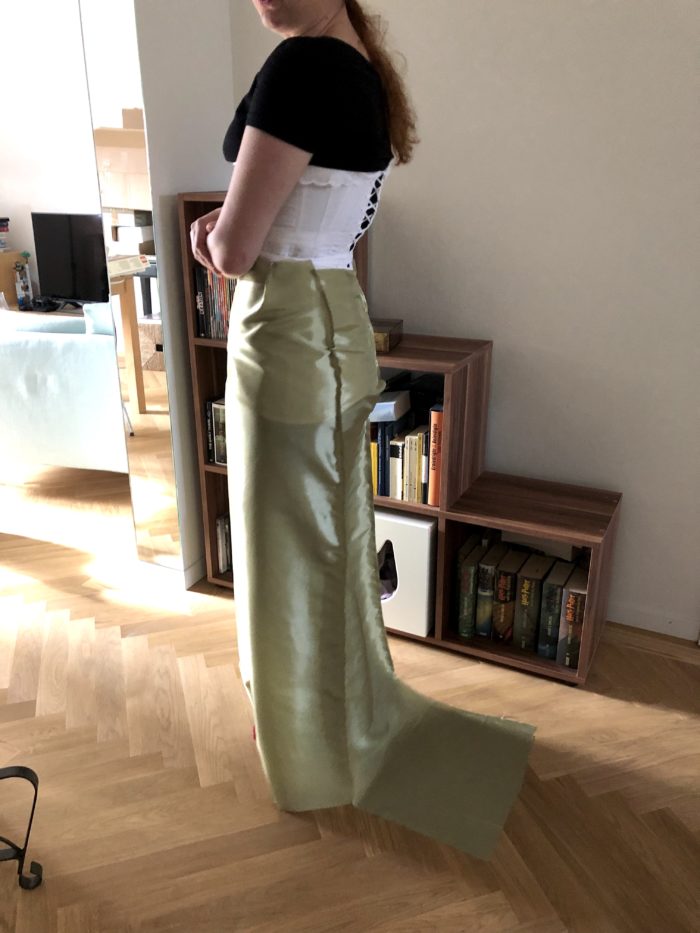
I will add another 2.5 cm on each side of the front panel from about 20 centimetres down on. That should solve the fold and fall problem. Other than that, I am really happy with this first try, I expected it to be worse.
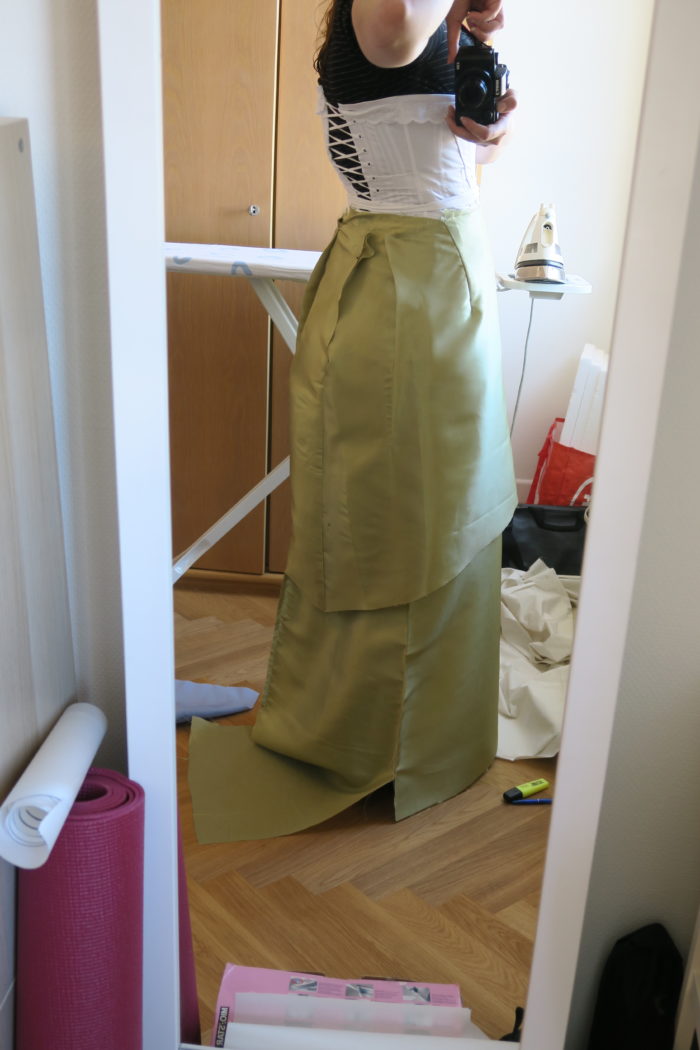
As I already mentioned, I should not have added more length to the overskirt panel. The 2cm I added where the fabric is folded actually turned out well since the darts are now sitting at the right place. So these will also be added for the improved pattern. This picture was taken before I ironed the pleats:
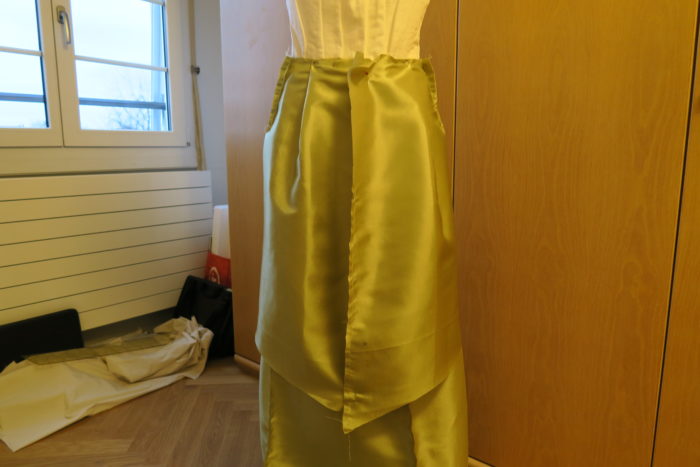
The additional centimetres in the back are not necessary though. I will take these out and maybe place the side back pleats a bit more towards the side of my waist, now they are in the centre of my back, they should be more towards the side of my body.
The front looks fine. I just have to even out the hem, I don’t want it to have a curve. The pleats at the side could be a little bit longer too, but I think, this will work well.
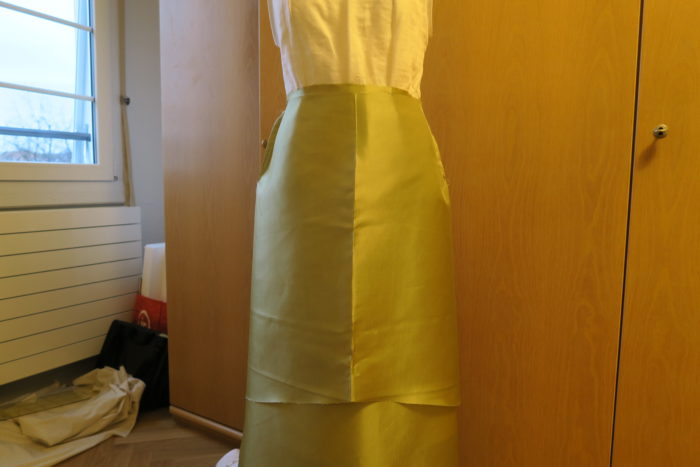
And here’s what the mock up looks like after my alterations and ironing it:
And the back, it looks more or less decent now:
I am pretty confident, that it is going to work… So, no second mockup, at least not for the underskirt, I will assemble the skirt and show you how I did that in my next post.
Thanks a lot for reading, I hope you enjoyed and I wish you a great time ahead!
Love,
Ella