Hello everyone! I have finally finished my 1910s dress! After I took a break for a year from this project and actually from sewing in general. But I’m back since May and I also had the right idea this time. If you are interested in my other blogposts on my 1910s dress, you can find them here:
I also have a playlist on youtube with all the videos on this project. And if you are interested in the video for this post, here it is:
Let’s start with the post now:
As I said, I have been stuck for a year and didn’t think about this project, it was in fact hunting me from time to time when I saw it laying around in my sewing room. One day in May, when I was wearing my Merida skirt, I finally had the right idea. The problems I had:
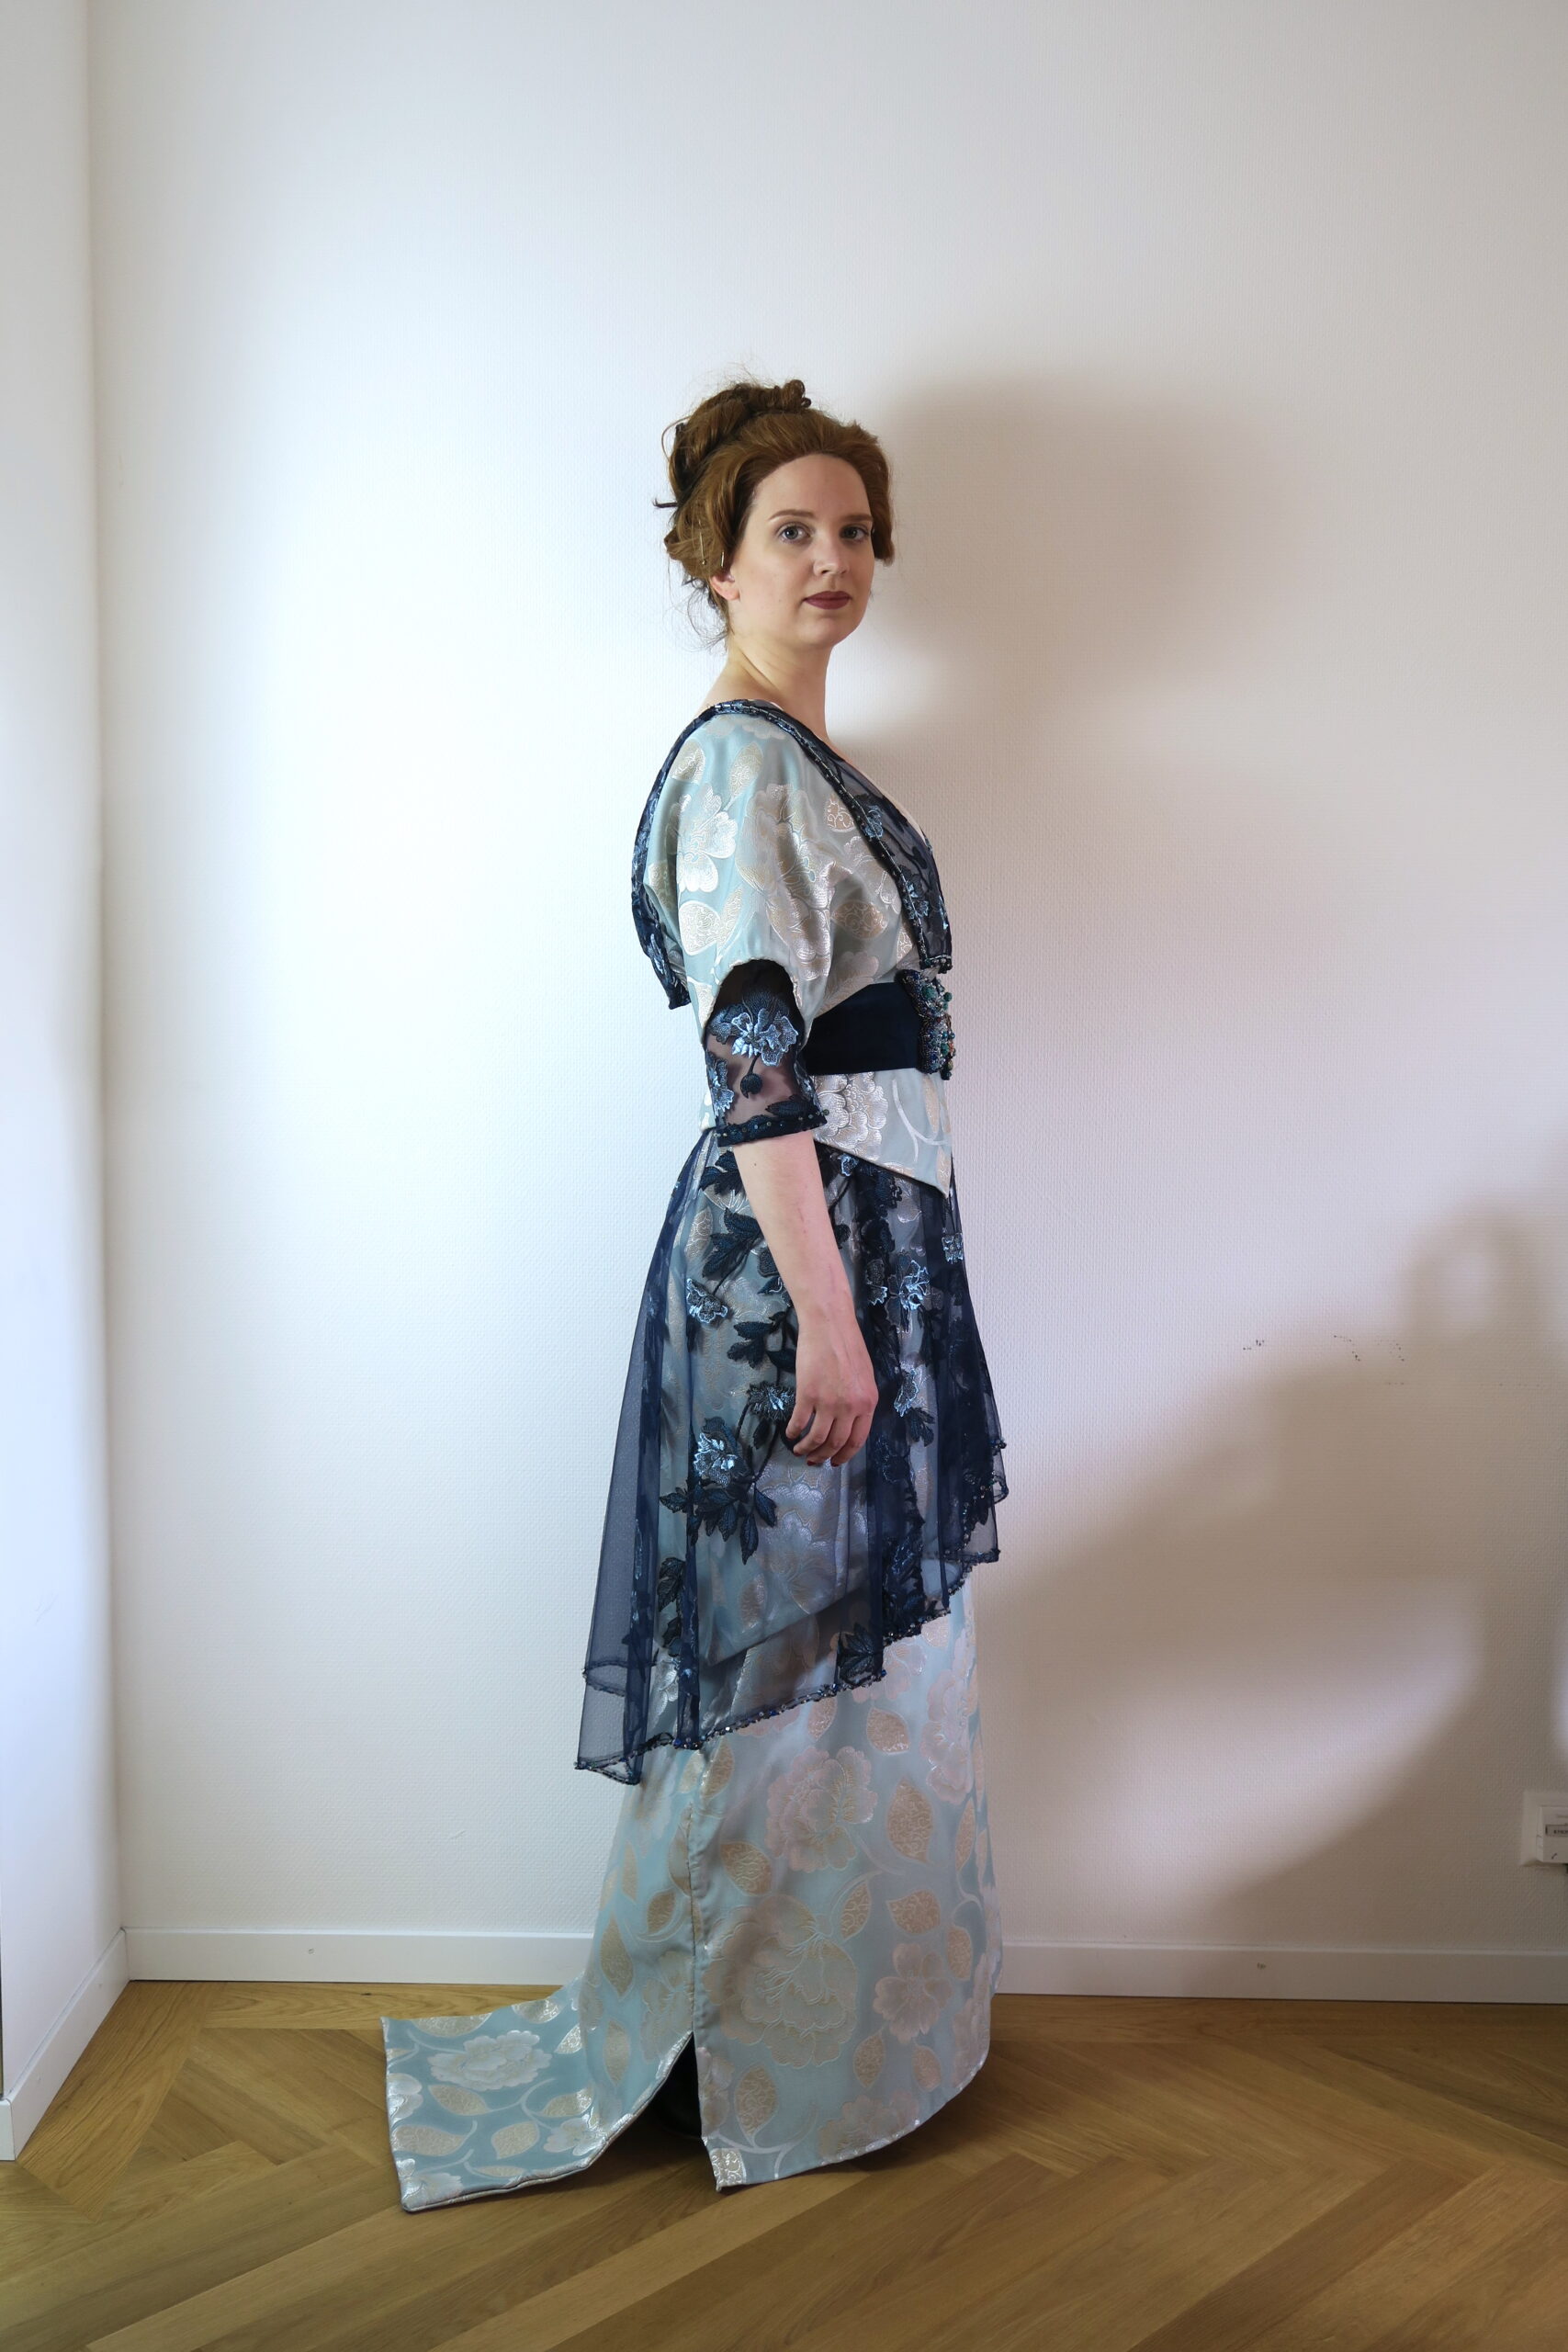
I was able to buy some more of the fabric, but was still left with the directional embroidery. The original dress’ skirt seamed to be a half circle skirt and it just didn’t occur to me (before I wore my Merida skirt, which is a half circle skirt), that this might actually work. I decided to try it out and copied the pattern of my Merida skirt.
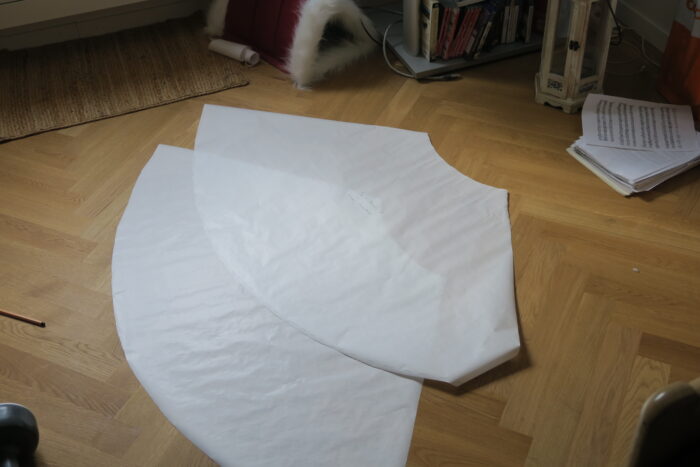
To create the right shape, I added some length to the back and shortened the front to get the fishtail optic of the original.
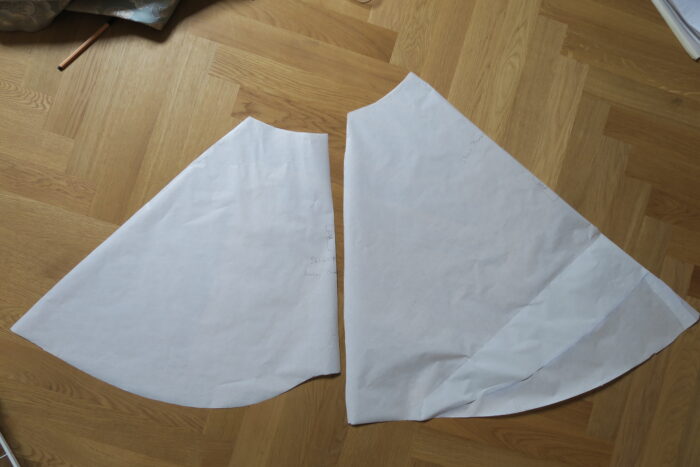
I made a quick mock up in a cotton with a directional strawberry print to see if the pattern worked. And it did 🙂
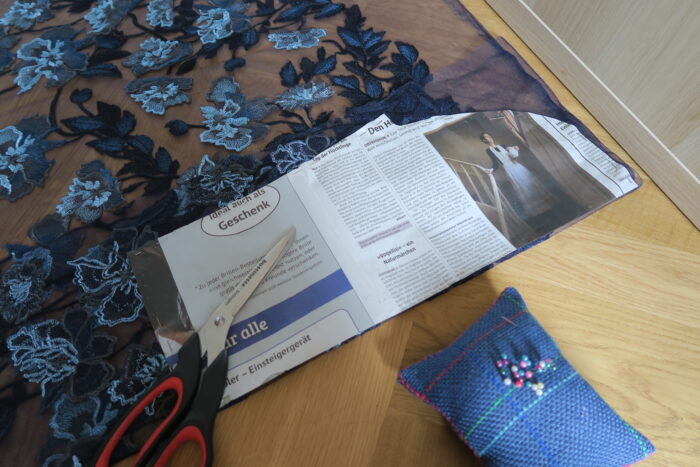
When I cut out the fabric, I put one of the flower ranks in the center of the back panel. I then used the height as an indicator for the shorter piece. The flowers in the back looked so pretty, that I decided, to not cover the tendril with the sash. I like the sash on the original very much, but I also love the flowers. The beaded butterfly would also shine more in the front instead of the back.
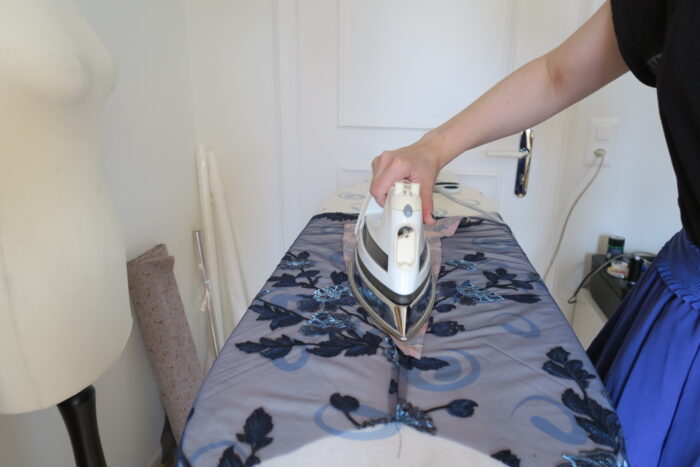
Then, I had to assemble the skirt. I decided to do some tests with the mesh first because I did not want the fabric to pucker. What worked well was sewing slowly and pull slightly behind the machine. All in all, the fabric behaved better than I had expected. I sewed one side completely and left an opening on the other side. I ironed the seams open, I decided against French seams, the fabric would not fray.
Then I started thinking about the bodice pattern.

It ocurred to me, that I could simply attach the skirt to my corset cover I made earlier. The corset cover was too big for me, I wanted to do some changes anyways. So I made my changes and took the corset cover in at the waist about 4 centimetres.
I decided to add sparkles to the skirt before sewing it on and after a few hours more over several days, I was finally done. After that, I sewed on the skirt and they matched perfectly.
For the sleeves, I had the idea to reuse my sleeve pattern that I made for my Robe à l’Anglaise. I didn’t sew a mock up for the sleeves. I just cut them out of my beautiful fabric, sewed them together, then pinned them to my corset cover.
They fit like a dream. I was very happy about this, I really don’t like drafting sleeves. Then, all that was left to do was adding sparkles.
I left the edges raw for both the skirt and the sleeves on the inside, since the mesh would not fray. The corset cover itself was already nicely finished. After trying it on, it was a bit scratchy around the arm wholes but I got used to it after a while, the fabric is on the softer side.
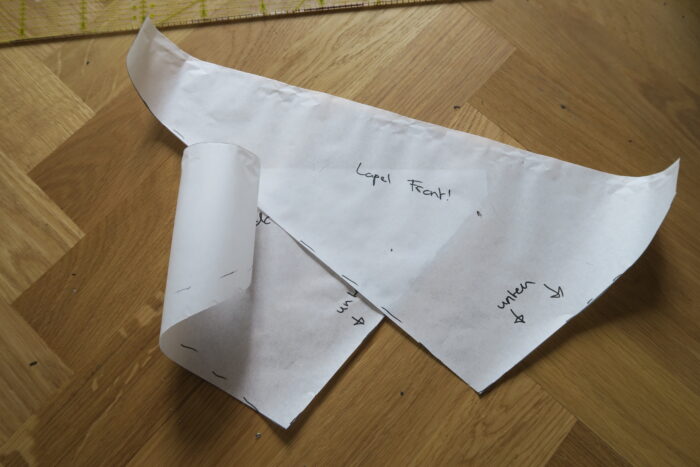
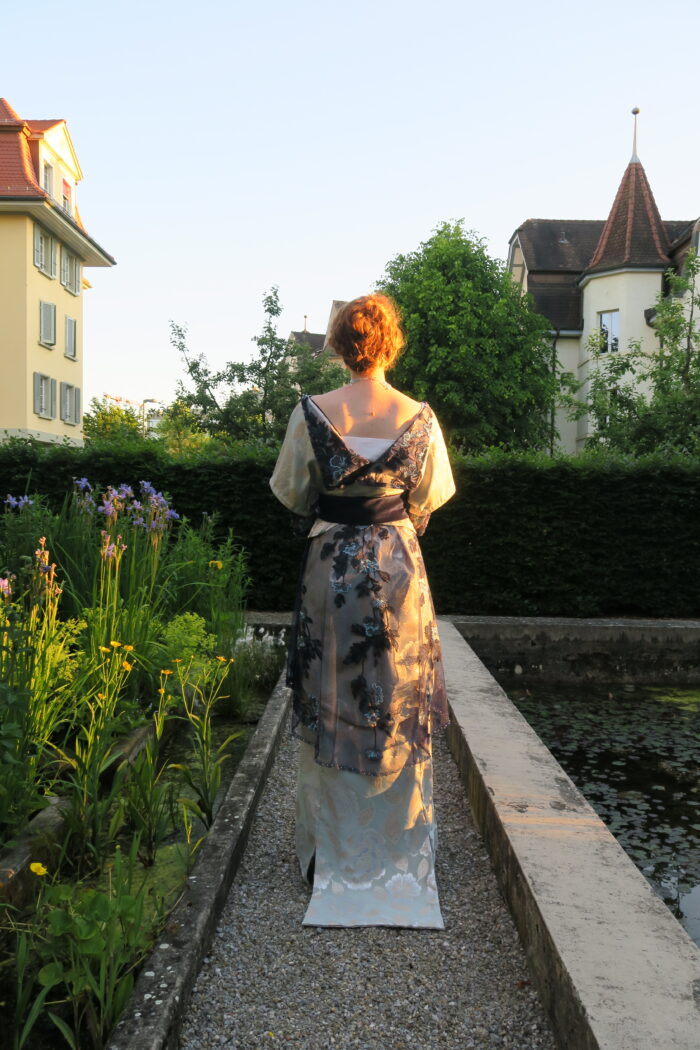
Then I drafted the lapels. I decided to add them directly to the jacket, that is the easiest way to keep them in position.
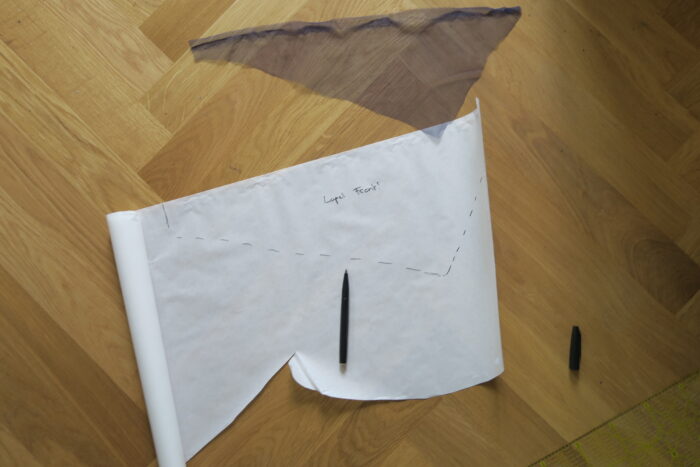
It was a lot easier to draft the lapels this time, where I did not try to draft a whole bodice with them. I am glad, that I waited a year to finish this so I could start with a fresh mind. Here are the two pattern pieces:
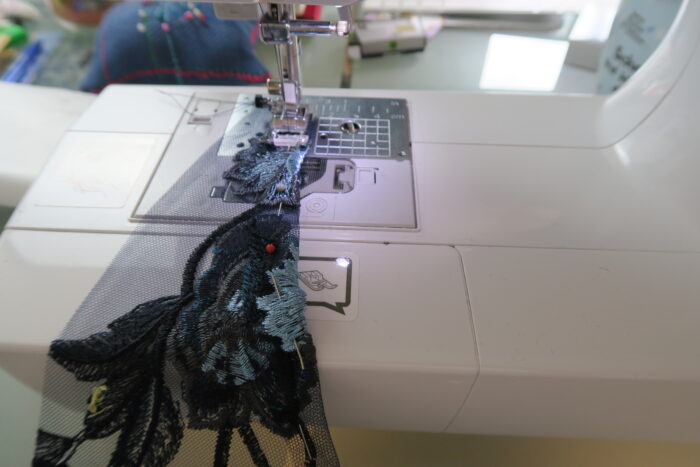
I machine sewed the hems and cut the seam allowance wherever it was visible from the outside. The seam would later be covered with beads, so I did not have to be too precise here.
Here are the lapels attached to the bodice:
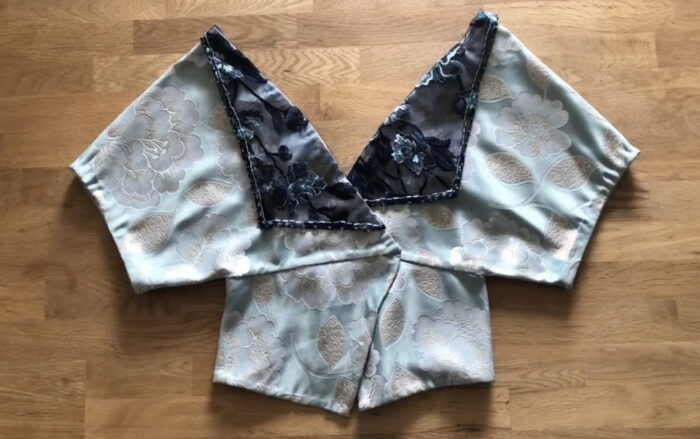
As you can see, I beaded the front with the remains of all the swarovski crystals 🙂 The beads make the lapels a bit heavier, which is good too. I unfortunately didn’t have any beads or patience left to bead the back:

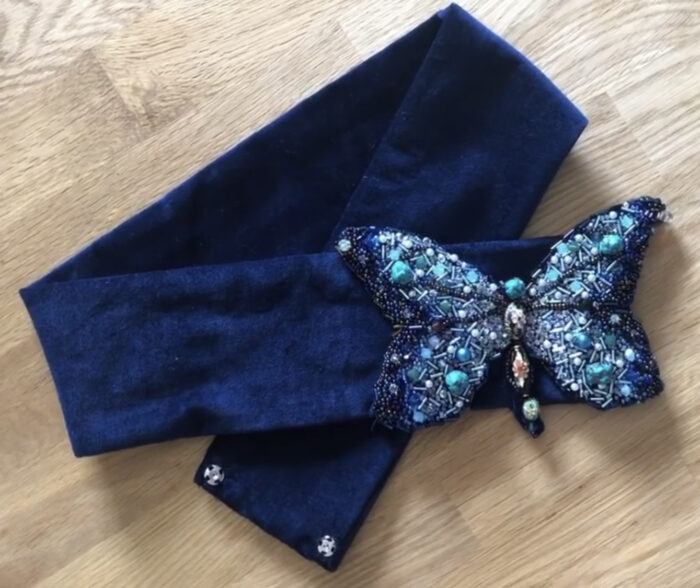
The only thing that was left now, was the sash. I measured my waist when wearing the dress and added 10 centimetres for the butterfly. Then, I cut the sash from cotton velvet, also here, no mock up. I really wanted to get this dress finished in the end, to be honest.
I folded the sash, sewed two sides by machine, turned and ironed it (using another piece of velvet) and then closed the remaining side using a slip stitch.
Then I added my beaded butterfly to it and added snaps to close the sash. And with the sash completed, the 1910s dress was ready.
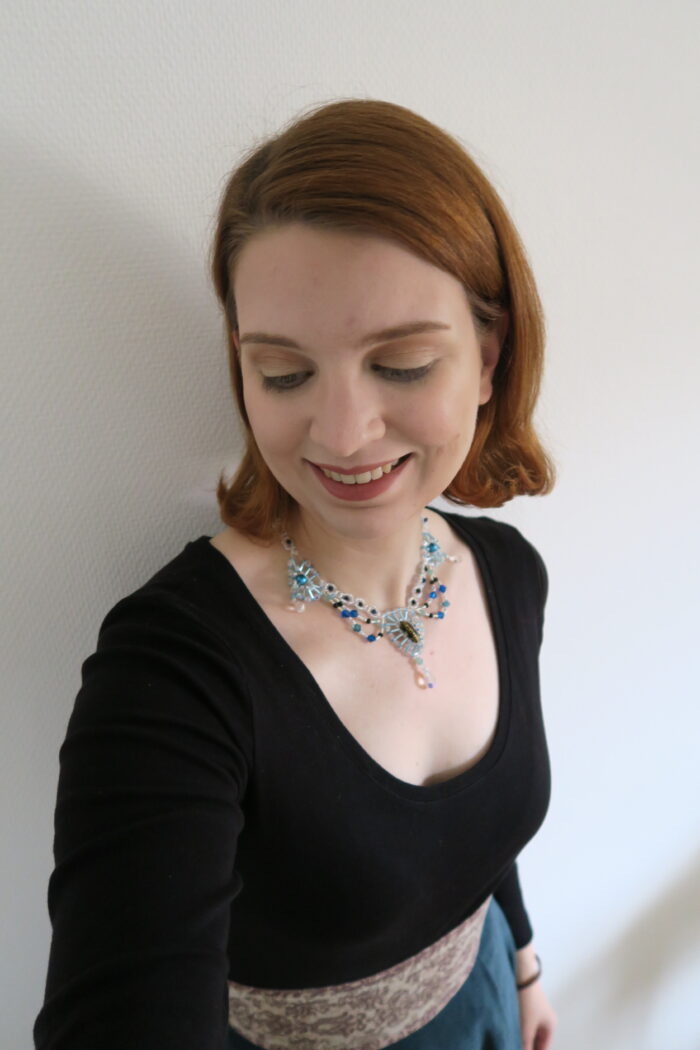
The last thing I made for this project is collier I based on a design, that I found online. You can have a look at it here. Mine is a bit more simple, I had to work with the beads I still had. So I for example decided to only add the “tendrils” in the front.

The elements, that make up this collier are:

I created all of these circle elements individually and then sewed them together afterwards and added the tendrils in the end. For closure, I added a safety pin… because lazy. But it works well, I left it until now, maybe I will add a real closure as soon as I have some in silver 🙂 Here is the finished collier:
And with that my 1910s dress was finally complete! I am kind of proud of this dress. It came out better than I had expected, to be honest. I like it 🙂 Here are some pictures of the finished dress:

And that’s it for today’s blogpost. Thanks a lot for reading, I hope you enjoyed and I wish you a good one!
Love,
Ella