Hello everyone 😀 Today, I show you how I assembled the kimono jacket that goes with my 1913 evening gown, that I am working on at the moment. If you are interested in any other part of this costume or the patterning process for the kimono jacket, you find everything below:
There is also a video available on my Youtube Channel:

By loading the video, you agree to YouTube's privacy policy.
Learn more
A quick reminder, here is my reference dress:

If you go directly to the museums page, you can zoom in pretty well, the pictures are really good quality.

This part is the trickiest so far. There is no side seam again, only the back seam, hidden by the sash. Also, from the look of the folds of the skirt, I’d say, it this is not gathered, but a circle skirt of some kind. That will be the first difference between the original and my version, my fabric has directional embroidery, so a circle is not ideal. So my skirt will be gathered instead.
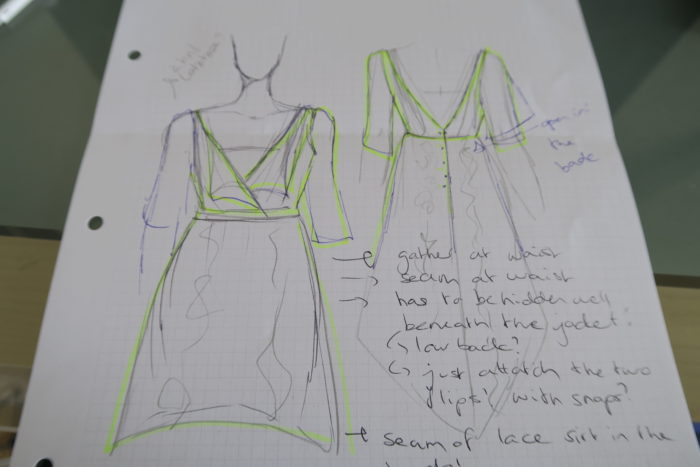
Also, unfortunately, there is no indication of what the construction of the bodice of this lace over dress looks like… So I just guessed.
I will overlap two panels in the front, just like I did for the jacket in the back. Closure has to be in the back. I just noticed that I forgot to add the lapels to the back on my sketch.
No project of mine without being short on fabric, right? So I started this piece by measuring my fabric and trying to figure out, how I could best use it. The piece of fabric I have is 1.50m long and 1.25m wide. I do have four complete strands of flowers and one is cut off. So that leads to another 10cm, that I would have to cut off to get the skirt symmetrical. leading to a circumference of the skirt of about 1.15m.

I decided to use the fabric in the wrong direction, so the flowers would “grow down”. It is a bit sad, that I will not use the densley embroidered parts of the fabric, but I thought that the mesh parts are nicer, because the embroidered part would cover the skirt underneath. Also, like this it would be easier to get something interesting and symmetrical.
I wanted to start draping with only the amount of fabric that I would have, so after measuring my fabric, I cut out a piece of the size that I would have from a cheap white lace I have in my stash since years. I will try to reuse it for some 18th century projects though, it will not be thrown away, I will use it someday.
As paradox as it sounds I started the draping process with sewing. I gathered the fabric down to the circumference of my waist (plus 2cm, since there will be a seam in the back).

Then, I pinned this piece onto my dressform and pinned the back seam together, then I started to shape it according to the picture. You can already see here that this is going to look very different due to the fact, that I will use so little fabric:

After that, I started with the bodice. I draped this without the jacket for the basic structure and the darts and left enough fabric to shape the lapels later on. After finishing the base structure, I got the jacket, put it over and draped the lapels.

This is, what the draped pieces ended up looking like. So I transfered these to paper, evening out the lines, adding seam allowance etc. Then it was mock up time and I cut out everything from the same fabric for a first try:

Assembling this would be very easy. I need to remember to start with the darts, which I of course forgot the first time, I had to undo the seam at the waist, sew the darts, sew the pieces to the skirt a second time… Here’s the task list for the assembly, if done correctly:
I did not finish any seam for this first pattern test and went straight to trying it on to see, if I’d have to start over or not. I was very unsure about this pattern, tbh, it did not make too much sense, I do not like working with fabrics like these etc.
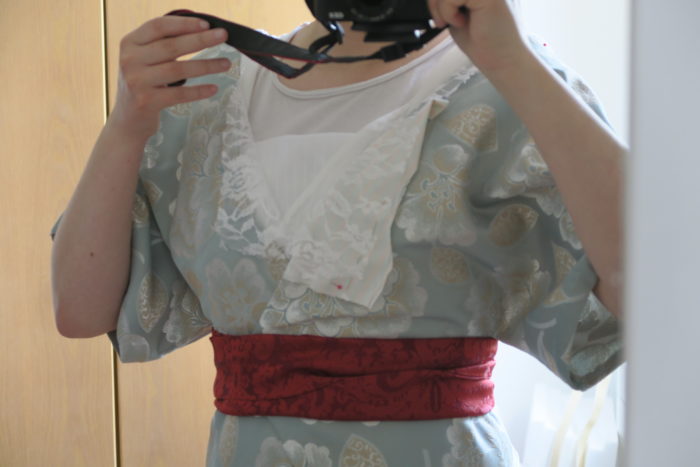
At this stage, I noticed, that I would probably not be able to put this costume on myself… It is almost impossible to get the lapels at the back out myself… Also, this fabric is so light, the lapels are flying around… So maybe, I will use some beads to make them a bit heavier. I think, a row of small beads would actually look really nice and also help to hide the stitches used for hemming…
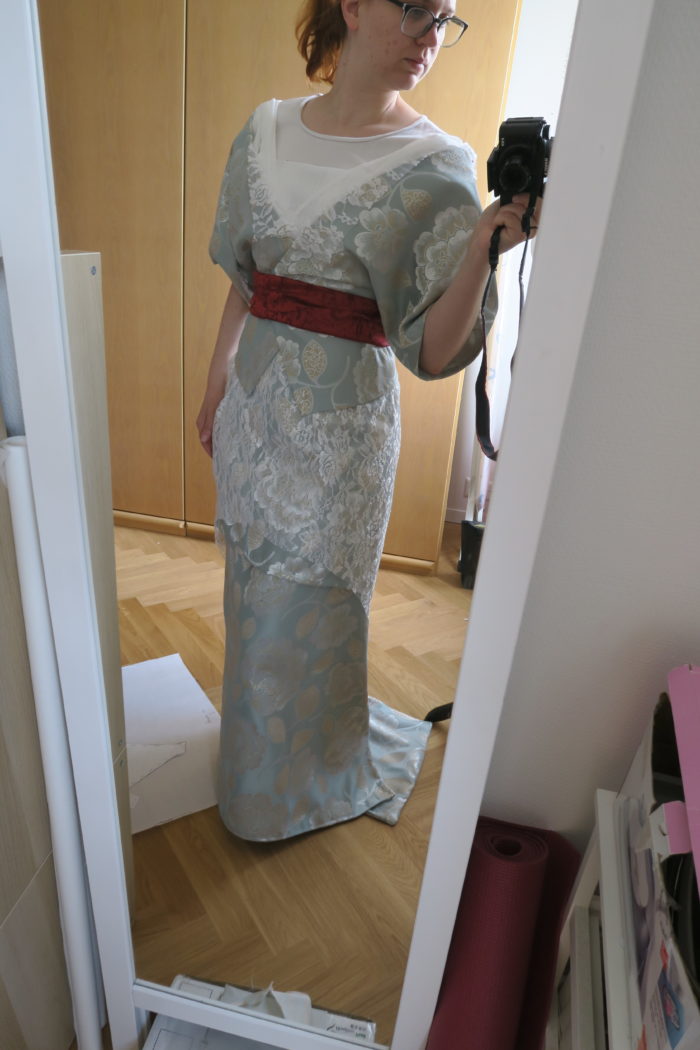
Now… there are several issues I have with this. The most visible one is, that it is not as wide as the original. I cannot change this however, because I do not have enough fabric. Maybe, I can add another 5cm, but it will not be enough. So, we will ignore that. But here’s what I can change:

For the back… Same problem, there is not enough fabric. Also, I did google how to best sew fabrics like laces and mesh etc. but it did not help a lot for the backseam, it is still puckering… Maybe, because I did not press it, so I’ll do that, once I have done the sash. But I will also practice a bit more with these kinds of fabric. Maybe, i will handsew this completely.
On this picture you also see really well that, where the jacket ends, the overdress is puffy… I don’t like that. I am also not sure about the angle of the skirt, but I think, I will decide what to do with that once I have the sash as well, maybe it looks better.
Speaking of the sash: It was at this time, that it occurred to me, that I probably should do the sash first… It will make determining the size of the lapels easier. And I was also a bit frustrated. So a change of “project” is probably a good thing.
The last thing I did on this, before starting to sew the sash, was to try and get the lapel right. But, as mentioned already, I will wait with correcting that pattern until I do have the sash done and a better idea of how this will look.
And that is it for this first post on the lace overdress. I hope, you enjoyed reading and I wish you a great day, evening, morning, whatever time it is at your place. Stay safe and healthy, many thanks and lots of love,
Ella